Reefing Under Sail

A few weeks ago I had the opportunity to watch one of the Tradewinds boats from a distance “struggling” in 25 knot plus winds at the eastern entrance to Raccoon Straight.  My initial thought was that the boat was in trouble, so we started in that direction to lend assistance.  As we got closer, we realized the motor was running, the boat was head to wind, and the crew as struggling to get a reef in.  It wasn’t fun to watch.  Both sails were being trashed by the wind (we needed to restitch the jib UV cover the next day) and the resulting reef was very poorly set.  Watching it reminded me of one of my mentors as I was learning to sail who had a favorite saying … “If you can’t reef under sail, San Francisco Bay will eat your lunch, and you have no business sailing there!”

As an instructor teaching Bareboat and Advanced Coastal Cruising classes, I have come to realize the truth and wisdom in this statement, and sadly, how may sailors out there can’t do it when it is actually safer, easier, and much less noisy than turning on the motor and pulling up head to wind.

To put a reef in under sail, come close hauled, trim the jib, and release the main. While the main is released, the boat will heal less allowing you to comfortably ease the halyard and put in the reef.  Typically the reef tack is set first, followed by the reef outhaul, and then the halyard is adjusted.  It is truly as simple as that. The only challenge is understanding the exact process as it applies to different boats.  Some boats have two lines (tack and outhaul) for each reef.  Some have a single line that sets both tack and outhaul.  Some have a hook and ring at the tack.  Some boats are so simple as to have a roller furling main that just needs to be rolled up a bit.  Regardless of the set up, sail close hauled with the main released and reefing will be a snap.

What happens if you are sailing short handed and your crew is scared and not able to help.  It’s not quite as quick and efficient, however, try reefing while hove to.  Generally that can be accomplished without the help of an untrained crew member.

One final thought.  Remember the rules of the road.  Reef while on a starboard tack and you will generally be the stand on vessel.
Posted in General, Skipper's Tip | 10 Comments

California Boater Card

Before I get started, a few “legal disclaimers.”  I am not an attorney.  Do not rely on this article as legal advice.  The article is simply my thoughts regarding a new law that has not yet been tested in the courts.

As of January 1, 2018 all persons 20 years of age and younger who operate any motorized vessel on state waterways, including powered sailboats and paddlecraft, are required to carry a boater card issued by the State of California, Division of Boating and Waterways, if you are looking for a marina check out https://www.jerrysmajestic.com/ to learn more from it.

On January 1 of each subsequent year, the age where a boater card is required increases by 5 years, as shown in the schedule below.

  • January 1, 2018 – Persons 20 years of age or younger
  • January 1, 2019 – Persons 25 years of age or younger
  • January 1, 2020 – Persons 35 years of age or younger
  • January 1, 2021 – Persons 40 years of age or younger
  • January 1, 2022 – Persons 45 years of age or younger
  • January 1, 2023 – Persons 50 years of age or younger
  • January 1, 2024 – Persons 60 years of age or younger
  • January 1, 2025 – All persons regardless of age

I am already over 60, so based on this phasing schedule I am not going to need to worry about it until 2025 … right?  Maybe, maybe not.  What happens when I turn the wheel over to an 18-year-old, just long enough for me to drop below to use the head?

One of the exceptions to the boating card requirements reads; “A person operating a vessel while under the direct supervision of a person 18 years of age or older who is in possession of a California Boater Card.”  So, it shouldn’t be a problem, right … wrong … I think … the exception doesn’t say in possession of a card if they are of an age to require one.  It says “who is in possession of a California Boater Card.”  I don’t currently have a boater card, because I don’t need one, however, if I am reading the exception correctly, I need one if I am to supervise someone who doesn’t have one, but would need one if I wasn’t supervising them.  Getting a headache yet?  Here is another exception.  I don’t need a boater card because I am in possession of a valid marine operator license, except that I might need one because of the supervision clause.

So, enough of that stuff.  How do you get a boater card?

First, take a class.  There are a number of options available, including home study with mail in testing, online classes, and in person classroom sessions.  Some of the classes are free, while others have a fee associated (generally about $30.00 as of December 2017.)  Information about currently approved courses can be found at: http://californiaboatercard.com/courses/
Note:  The California Division of Boating and Waterways, California Course for Safe Boating is a home study course available through Tradewinds.

Second, get proof of education.  Depending upon the class option selected, you may receive the proof immediately, or you may have to wait for one to be mailed to you.

Third, once you have proof of education, apply for the card online at  http://californiaboatercard.com/applynow/ .  There is a $10.00 fee for the card, which can be mailed in or paid online using Visa, MasterCard, or Discover.

In closing, here is one more exception to needing a boater card.  Rental boats.  When renting a boat, you don’t need a valid California Boater Card.  Which may cover boats chartered through Tradewinds, however, I can’t find the definition of “rental boat”, so I’m not sure.  As an instructor here at Tradewinds, I have made the decision to get a card right away.  I don’t need to get one until 2025 based on my age and my “captains license”, however, as an instructor, students that would need a card, but don’t have one, will be under my direct supervision, so I believe that I need one anyway.  I highly recommend you get one also, just in case.

Posted in General | 8 Comments

FRAP!

No, I’m not cursing at you, although it is one of my personal pet-peeves!

Here it is from Merriam-Webster:

verb \ˈfrap\

frapped frap·ping

Definition of FRAP

transitive verb

:  to draw tight (as with ropes or cables) <frap a sail>

I’m not sure why they say “<frap a sail>” – I’ve never heard it used in that way. A common use around here is, “Frap your halyards!”

This morning as I was headed down to the docks to make a couple of pre-Saturday repairs, I was met by a friend, who is also a live-aboard (lives on his boat). His complaint to me was that it was very hard to sleep the night before because of all of the banging halyards! This prompted a walk-around of the Tradewinds Fleet and 3 emails to members about frapping halyards this morning!

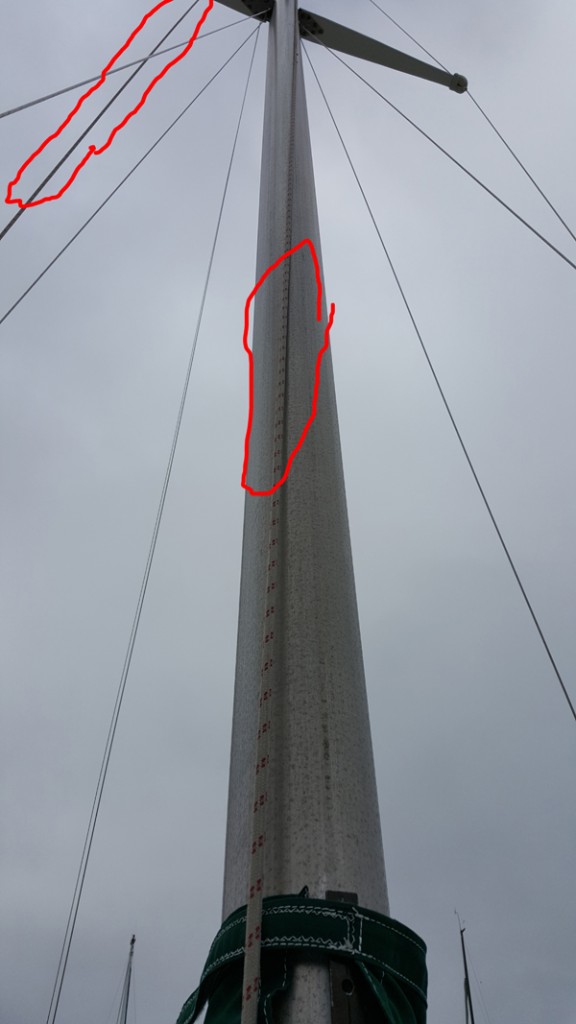
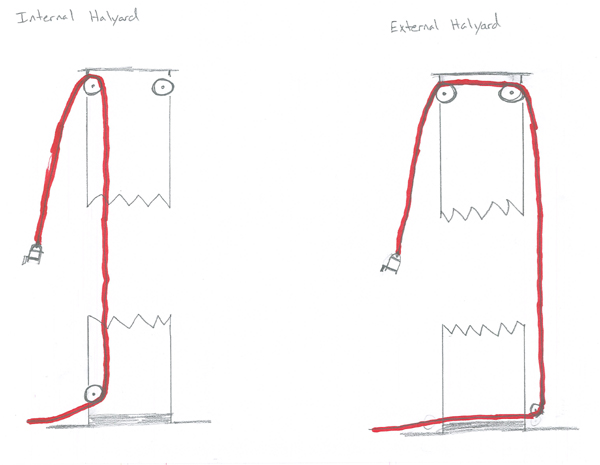
This one should have been an easy one – there is only one half of the halyard outside the mast, the other half is internal. It is simply a matter of loosening it, flipping it around the spreaders, and tightening it up.

Here’s an example of a little tougher one to remember (excuse my crayon drawings!):

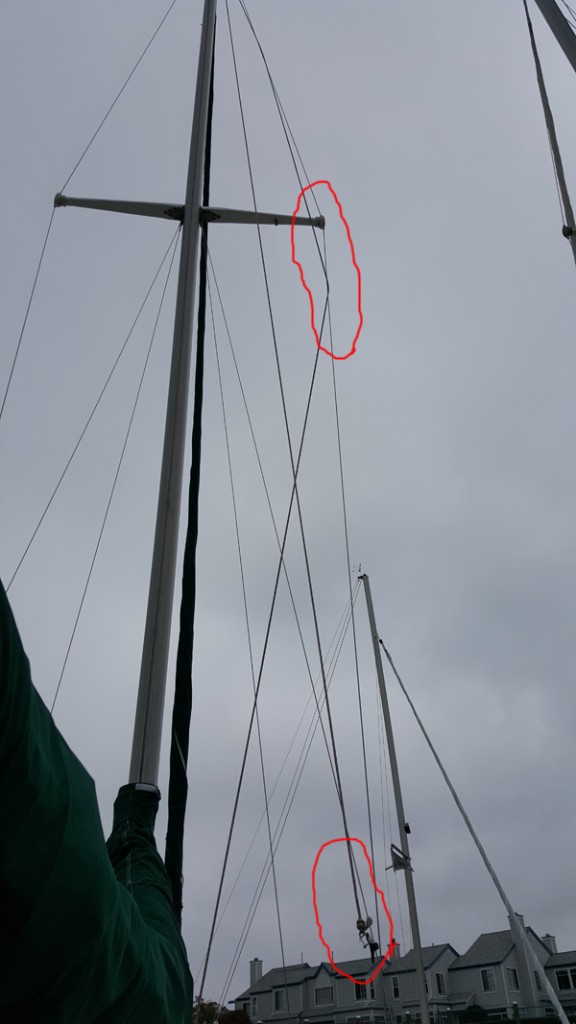
Not Frapped!

This Halyard is Not Frapped!

In this case, the SIQ (sailor in question) remembered to clip the end of the halyard that connects to the head of the sail away from the mast, but forgot the other half! This is an external halyard. Both halves of the halyard are on the outside of the mast. This must be loosened, the shackle end clipped away from the mast, the other end flipped around the spreaders, and then tightened and secured.

Here’s another one of my wonderful crayon drawings illustrating the difference between internal and external halyards:

Frap it!

Internal vs. External Halyards

Here’s another great crayon-ed on drawing of the previous one, properly frapped this time!

Properly Frapped External Halyard!

Properly Frapped External Halyard!

Now the simple version:

Before you leave, look up the mast! If there are any lines on it, something isn’t stowed properly! If you are unsure how to properly frap a halyard on a specific boat, please ask! Help us respect our neighbors by letting them get a good night’s sleep! There will probably always be halyards banging in the marina, but let’s not let them be ours!

Happy Frapping!

-Matt K

Posted in Skipper's Tip | 1 Comment

There Are So Many Twists I Can’t Trim the Main!

Have you ever felt that way?  So have I.  Sadly, you and I are probably the reason the line is all twisted up.  Most of us are guilty, especially while we are learning, of doing one or both of the following “bad things”.

Coiling the line wrong!

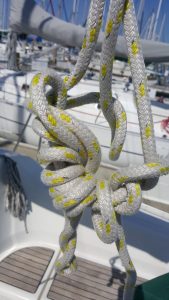
Figure 8’s in Braided Line

There is a lot of disagreement regarding the proper way to coil a line.  The reason?  There are two different types of line, layed and braided.  Each needs to be coiled differently.  If you learned to coil layed line, you are probably going to coil braided line incorrectly, and visa versa if you learned on braided line.  How do you stop the kinks?

When coiling a layed line, the line will naturally fall in nice clean coils … in other words … no figure 8’s.  When coiling a braided line, it will naturally fall into a figure 8 pattern.  If you remove the figure 8 pattern, every loop introduces a twist.  Over time, coiling over and over will make a nasty mess.  Let the line fall naturally while coiling.  The line will naturally do what is needed to not twist.  The benefit is a line which runs free without getting kinked.  Also, never coil line from the bitter end.


Putting a line on a winch.

Winch Induced Twist

Yeah, I know, that’s what a winch is for.  Just remember. Every wrap on a winch introduces twist.  If you don’t remove the twists regularly, problems develop.

While we are on the topic of line and winches.  For safety, there are two lines that should never go on a winch.  Furling lines and reef lines.  These lines are not strong enough to withstand the pressures generated by a winch.  Neither is the forestay when furling a jib. Truth is, if you need a winch, you are doing something wrong. Jibs should be furled (and reefed) on a broad reach to run while the jib is blanketed by the main.  No wind, no load, no problem. Mainsail reefs should be put in while close hauled, with the main luffing. Again, no load, no problem.

Once twists are introduced, the only way to get rid of them is to start at the end (NOT the bitter end) and untwist the line.  You may need to do it a few times to get rid of all the twists, however, it’s well worth it.  Twists make lines work poorly, and cause damage when cuckolded (that ever-hated kink or a..hole we all dread.)

Posted in General | 2 Comments

Ngalawa Cup: Racing on the East Coast of Africa! By Kevin Mihalik

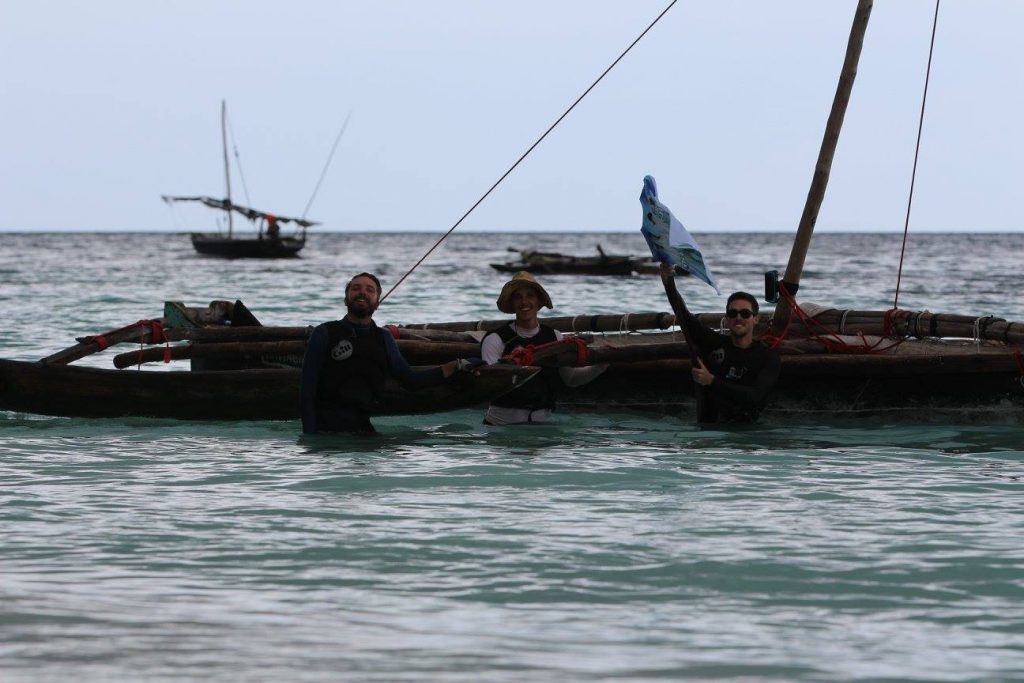
This past summer I was approached by my friend who badly wanted to participate in the Ngalawa Cup Sailing Race in Tanzania. He needed an experienced sailor to sign up his team, and he knew that I was a Tradewinds member and a decent enough sailor. I reluctantly agreed to captain an unfamiliar engineless sailing vessel with a crew of two land lubbers in a survival sail race. It would begin in the southern Tanzanian coastal village of Kilwa and would end 10 days and over 300 nautical miles North on the upper tip of Zanzibar. Becuase I was taught to sail at Tradewinds, I had no doubt I was ready for this adventure!

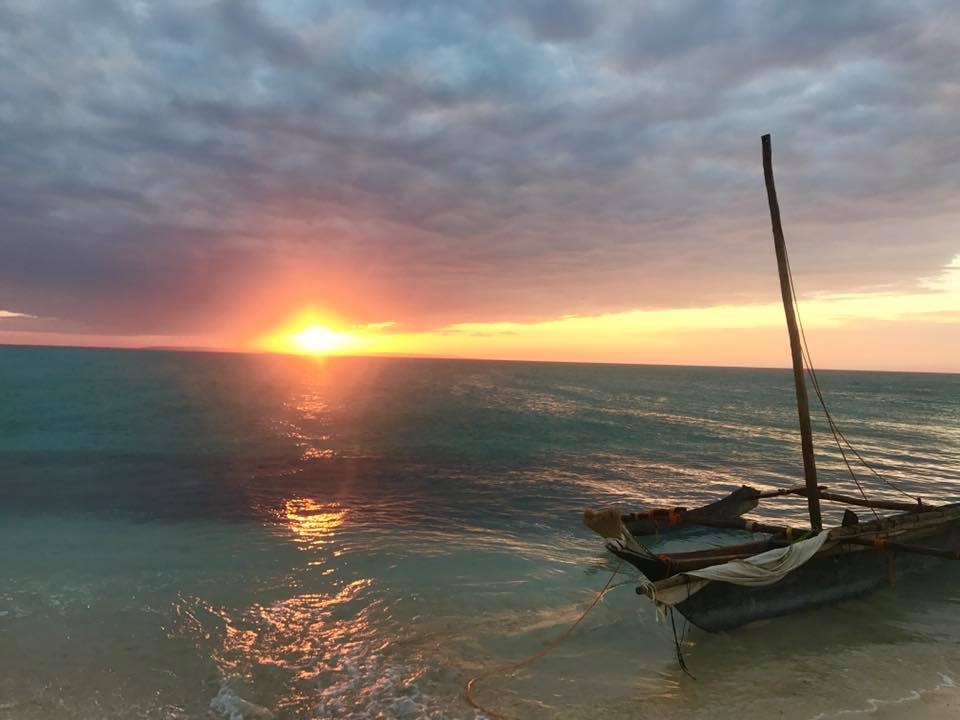
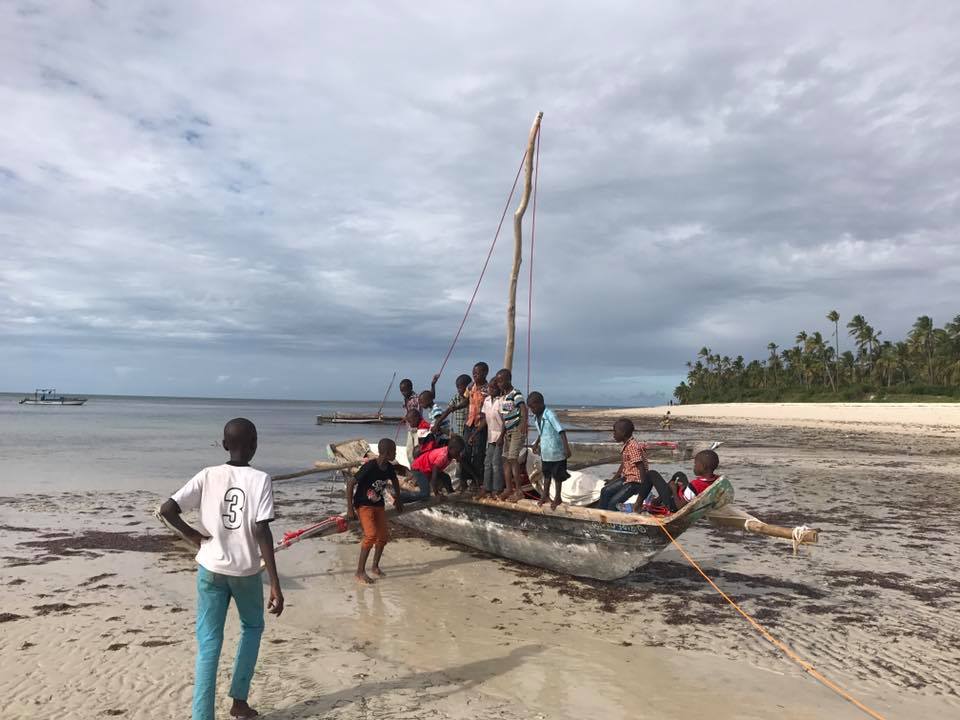
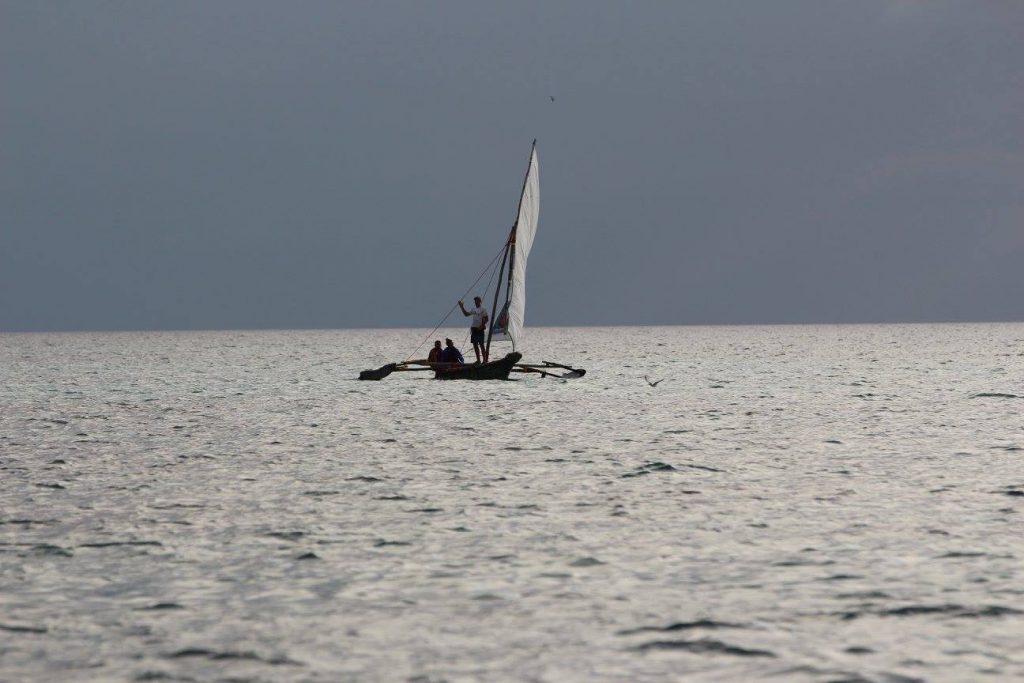
The Ngalawa: Upon arriving in southern Tanzania we were introduced to the vessels we would be bonding with over the next two weeks. The Ngalawa is an ancient African design originally used by fishermen for short trips close to the coast and not built to withstand long offshore passages. Each boat was hand made- the canoe carved out of the trunk of a mango tree. It had two large wood pontoons that were lashed to crossbeams in the boat and a thick treebranch for a mast. The yards were mostly bamboo, and our sail was nothing more than an old smelly peice of canvas with patches and tears. The hulls would leak like a spigot, so we were given a cotton cloth and wads of cow fat for plugging the leaks. It was explained to each team that these boats would most definitely break down, and we would have to either fix them ourselves or make our way to the nearest island and find a local “Fundi” (Swahili for Boat Expert) who could help with repairs.

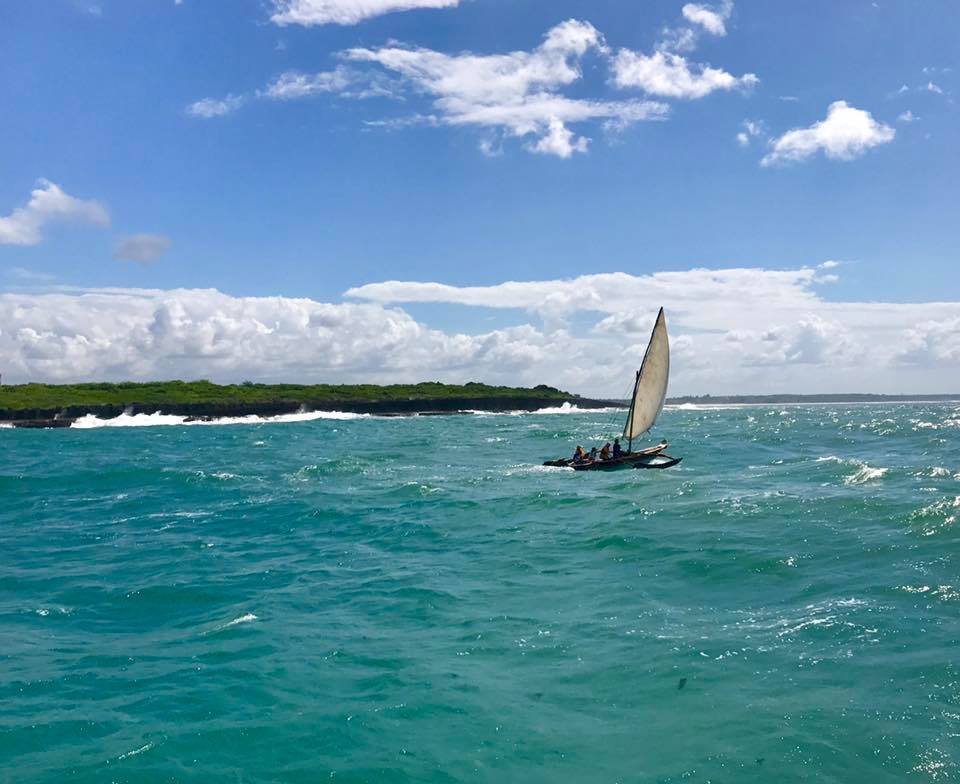
The Course and Rules: We began each morning at 0630. Using GPS trackers we could log our start time and locations. Our GPS would ping on an hourly basis, giving our general location. Each day we sailed between 30 and 60 miles, going from one remote island to the next. We had to be on an island by sundown each day and log our landing, or else we would prompt a search and rescue by the rescue boats. The islands we stayed at each night were remote and either uninhabited or contained small tribal villages of local fishermen and their families. Some islands were required checkpoints; for other stops we were given choices for strategic value.  Each team was given inflatable pontoons and instructions on how to right a capsized vessel. Each sailor was given a GPS tracker and an LED light signal in case a MOB recovery was unsuccessful. Rescue was often hours away, so self reliance was key.

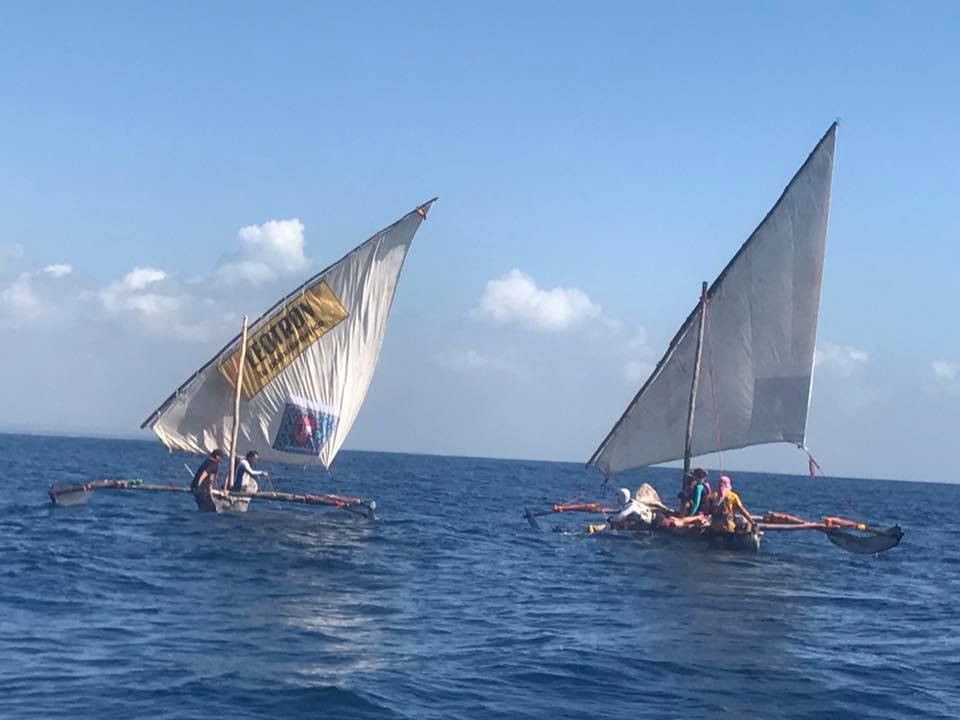
The Competition: This race is sponsored twice a year- once in late June and once in January. The teams are comprised of whoever signs up! This summer we were 1 of 6 teams: the British, the South Africans, the Australians, the French, the Spanish, and the Americans ( ‘MERICA!!!).  It was required that at least one sailor on each team have at least a little sailing experience. Due to the vagueness of this requirement, knowledge and skill levels varied WIDELY among teams. It was hard to determine who our biggest challenger would be; but on day one the British team took a strong lead within hours, so it remained throughout most the race that we were neck and neck with these cheeky sailors.

The Adventure: On day one we snapped our rudder in half and ran aground on a coral reef 3 miles off the mainland. With waves crashing down, filling our little Ngalawa, we managed to drag ourselves off the reef and use a paddle to steer our way to the next island for repairs. On day two we were hit by two squalls with gusts reaching 35+ knots. Three teams capsized this day, and one had to rescue a man over board. On day three another team’s member stepped on a stone fish, lost feeling in his leg all the way to his hip, and nearly blacked out from the pain. On day four the British team, in an effort to gain some extra time, chose to land on an island with strategic value for the race; but this island was known for having thieves, and rats the size of dogs. They didn’t sleep a wink. On day five we sailed out of the harbor of Dar Es Salaam, and while navigating the tankers and ships, we eventually found ourselves coasting through a sea of dozens of fishermen in their tiny wooden canoes. With a small battery powered speaker mounted to our mast, we blasted full volume the ‘Pirates of the Caribbean’ theme song and got the most confused looks from these local seamen. On day seven we ran out of food and had to barter with a local island’s tribal village for bananas, coconuts, fish, bread and water. On day nine we landed on the white beaches of Zanzibar’s historic Stone Town. It happened to be the last day of the Islamic holiday of Ramadan, with festivities all over the city – we ate like KINGS. On day nine we raced all day within inches of the British team trying desperately to place first! We landed on the North end of Zanzibar just minutes after the British, and we finished in second place overall. Remarkably, we sailed so well that we actually ended a day early. Over the next 36 hours, the last 4 teams made their way to the finish line, and that night was a party like no other! WE SURVIVED THE NGALAWA CUP!!!

My teammates are avid photographers and managed to bring a drone on the trip! I left mine back home – using it as a security unit (more – at www.sixtechsys.com). They compiled an amazing video so please check it out on youtube at:


For those interested in future Ngalawa Cup Races, you can find information at theadventurists.com

Posted in General | 2 Comments

Be Careful Out There

Anybody know what the two busiest boating weekends on the Bay are?

One is Opening Day on the Bay (the last weekend in April.)  The other is Fleet week, which is the first week or two of October.  This year, Fleet Week is October 5 through 8, with the main events taking place on Saturday the 7th and Sunday the 8th.  There are times during these events when it feels like you can walk across the boats occupying the waters of San Francisco Bay.

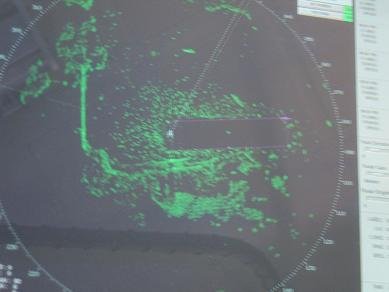
Here’s a photo of a radar screen taken during a previous Fleet Week event. It’s easy to pick out the Golden Gate Bridge, Alcatraz, and the land mass that is the San Francisco Peninsula. The black rectangle is the exclusion zone. The rest of the green dots are boats!

Fleet Week Radar Plot

Personally, I think Fleet Week is the “worst” of the two.  Not only are there a lot of boats, they are all crowded into a limited area and large areas of city front are closed, AND everyone is looking up at the air shows!  An absolute recipe for disaster.  I think my favorite example of the challenges Fleet Week can present came when the skipper of a sailboat was arguing with the Coast Guard over the VHF regarding who had the right of way … him or a container ship.  Seems this guy believes he has the right of way because he is a sailboat and the container ship is a power boat.  There was no convincing him that he was wrong.

With that in mind here is a quick review of the Rules, and the actions required by the Give-way and Stand-on Vessels.

  • Not Under Command (don’t see this one very often)
  • Restricted Ability to Maneuver (the Coast Guard may hold this type of traffic during the main events)
  • Vessel Engaged in Fishing (don’t see this on the bay very much)
  • Sailing Vessel (Port Tack gives way to Starboard Tack … If Same Tack, Windward Gives Way to Leeward)
  • Power Vessel (includes sail boats if the engine is engaged)

Rule 16 – Action by Give-way Vessel

Every vessel which is directed to keep out of the way of another vessel shall, so far as possible, take early and substantial action to keep well clear.

Rule 17– Action by Stand-on Vessel (a) (i) Where one of two vessels is to keep out of the way, the other shall keep her course and speed.

(ii) The latter vessel may however take action to avoid collision by her maneuver alone, as soon as it becomes apparent to her that the vessel required to keep out of the way is not taking appropriate action in compliance with these Rules.

(b) When, from any cause, the vessel required to keep her course and speed finds herself so close that collision cannot be avoided by the action of the give-way vessel alone, she shall take such action as will best aid to avoid collision.

(c) A power-driven vessel which takes action in a crossing situation in accordance with Rule 17(a)(ii) to avoid collision with another power-driven vessel shall, if the circumstances of the case admit, not alter course to port for a vessel on her own port side.

(d) This Rule does not relieve the give-way vessel of her obligation to keep out of the way.

Check out Rule 17, Part b … to paraphrase … if the guy that’s supposed to give way doesn’t … you must get out of his way!  It’s interesting to note the there is no “Right of Way” … there are Give Way Vessels and Stand On Vessels!

Any way it goes, if you are out there during Fleet Week you are going to have a lot of ColRegs practice … know the rules and be careful out there!

Posted in General | 1 Comment

Get off the Boat!

No, I’m not mad at you and making you get off the boat at some distant port where you must walk home. It’s me that I am talking about. It’s the skipper that must get off the boat. Never cast-off dock lines without the person responsible for the safety of the vessel and crew getting off the boat and taking a walk around the vessel while making a final check of SAFETOGO and COOL items. Especially, the Onboard rigging, Coolant, and Overboard Lines portions of the checkout process.

For a refresher of SAFETOGO:

  • Safety Equipment
  • Atmospheric Conditions
  • Floorboards
  • Engine
  • Tides and Currents
  • Onboard Rigging
  • “Gas” or Diesel
  • Steering

And Cool:

  • Coolant
  • Oil
  • Overboard Lines

Before starting the saltwater motor from What is 180, all items of SAFETOGO and COOL must be checked off. Unfortunately, too often that’s the end of the safety check process. It shouldn’t be!

Immediately after starting the motor, go back and do a more complete check of the onboard rigging, coolant, and overboard line situation. The best way to do that is to get off the boat and do a walk around.

Start wherever the exhaust from the motor exits the boat. Then, make as complete a circle around the boat as the docks allow, checking every aspect of the boat from stern to stem, and from waterline to the top of the mast. Follow an organized process … better yet … develop a checklist for yourself to follow.

For example:

  • Exhaust – is there sufficient coolant exiting the exhaust to indicate proper cooling of the motor is taking place?
  • Transom – is/are there signs of damage? Backstay properly attached?
  • Stern Pulpit – Damaged? Sturdy? “Legs” properly fastened? Lifelines properly attached?
  • Backstay – Move your eyes the entire length of the backstay, pausing regularly for a few seconds to let your brain catch up and interpret what your eyes a seeing. Yes, there is a difference between looking and seeing. It’s your brain.
  • Mast head backstay connection – use binoculars if it helps.
  • Mast head instruments – in place and working properly? You might even have someone check the electronic readouts on any mast head instruments to make sure they are working.

So far, you have not even moved from the original starting point. Now, start moving slowly forward, checking things as you go.

  • Hull?
  • Toe rail?
  • Stanchions?
  • Lifelines?
  • Are there any lines in the water?

When you get to the shrouds:

  • Chain plates?
  • Turnbuckles?
  • Wire?
  • Spreaders – (this one check should be slow and complete) Proper horizontal angles? The same on both sides? Shrouds over the tips? Properly attached to the mast? Visible cracks? Anything that just “doesn’t look right”?
  • Below spreader attachments?
  • Mast head attachments?

Continue forward looking at the hull, toe rail, stanchions, and lifelines, and lines in the water:

  • Bow pulpit?
  • Bow roller?
  • Anchor?

At the forestay:

  • Deck attachment?
  • Furling drum?
  • Jib tack – is it properly attached and positioned in relation to the furling system?
  • Jib sheets – properly attached to the clew with two wraps around the furled sail? Properly routed along the deck, through fairleads, and back to the jib sheet winches?
  • Jib halyard properly tensioned (DO NOT change the jib tension … if a problem is noticed, notify the office and we will correct it).

Start moving aft repeating the process on the other side (in reverse).  When you arrive back at the transom:

  • Topping lift – in place? Damaged? Functioning properly?
  • Visually check the main halyard – Properly attached to the head of the sail? Properly routed to the top of the mast? Wrapped around or through anything (topping lift, lazy jacks)

By now, your eyes should have traveled to the top of the mast at least twice.  Each time, follow the mast back down and check everything (e.g. are all clutches on the mast closed).

At some point during the walk around, you will pass the shore power connection. Is it disconnected and secured on the dock (or, removed from the dock and stowed aboard if you are going to dock overnight somewhere with shore power)?

How about dock lines. As you move around the vessel, check what lines are in place, and which might be safely removed as you go. For example, can the springs be removed and placed safely on the dock? I personally make sure any line long enough, and positioned in a place that it can reach the propeller, has been removed and placed securely on the dock. I do not want it to fall in the water while casting off.

In closing, as a captain, it is critical that before casting off lines and departing, you personally have done everything in your power to verify the safety of your vessel! The lives of yourself and your crew may depend on it.

Posted in General | 1 Comment

Just Bail Out Dude

I relearned a valuable lesson the other day.  I really hadn’t forgotten it, I just chose to not apply it.  The lesson?  If it isn’t happening the way it is supposed to, just bail out and start over again.  Don’t try to save it.

So, it’s confession time.  A couple weeks ago, in my own boat, I had just left the pump out station, and was backing down the fairway to back into my slip.  Something I regularly do.  For some reason, the boat wanted to drift to one side of the fairway.  The weird thing, it was the windward side that I kept drifting towards and away from prop walk.  It made no sense.  The smart thing to do would be to just start over, but I kept telling myself I could fix it … right up to the point my lifesling box touched the stern of another boat.  Fortuntely I was moving very slow and it was plastic on my boat against stainless on the other boat so there was no damage to anything but my ego.  The one thing I did right was to keep my bow pointed away from trouble, so I was able to get away with no further incident.

After getting the boat in her slip, I thought about what had happened.  It was one of the largest tidal swings of the year.  Large enough that there was noticeable current in a marina that current isn’t a problem.  I was moving with the current and didn’t even realize it.  Had I bailed out, I probably would have figured out what was happening and made adjustments accordingly.  But, I didn’t.  Lesson learned.

Don’t worry, I didn’t just walk away.  I went over and talked to the other boat owner.  He was on board and hadn’t even realized he had been “hit”.  To be safe, we checked his boat out together and verified no damage (except, as I said, to my ego, but that’s OK, the next day I had to single handed sail a boat with a dead motor back to the dock, and nailed it.  Ego fixed … but that’s another skippers tip.)

Posted in General | 4 Comments

Slipstream

A better title for this Skippers Tip might be Slipstream, Prop Walk, and Rudder Control, however that seemed a bit long and tedious, so lets just call it Slipstream.

According to Merriam-Webster, slipstream is defined as “a stream of fluid (as air or water) driven aft by a propeller.”  We often times use the term “prop wash” to describe the phenomenon , however, slipstream is the more correct term.  Slipstream is easy to see.  Simply shift the transmission into forward, and watch the water behind the boat.  The current travelling backward from the boat is slipstream, and is one of the most valuable forces at your disposal while motoring.  Control of a sailboat is obtained by either getting current flowing across the rudder due to movement thru the water, or by slipstream created by the propeller forcing a stream of water aft over the rudder.

To understand slipstream, lets start with a very basic discussion of the propeller.  A propeller is generally defined by four criteria; number and shape of the blades, diameter of the circle the propeller turns within, pitch, and direction of rotation. A notation stamped into the propeller such as 12 X 10 RH indicates a clockwise (or right hand) turning, 12 inch diameter prop with a 10 inch pitch.  Basically, a propeller is a screw (which is actually another name for the propeller).  Pitch is an indication of how far the prop would move forward if there was no slipping thru the water.  In this case, 10 inches of forward movement for each revolution of the prop.  Unfortunately, water is soft and slippery, so as the prop turns it does not make it 10 inches and any excess water it grabs is forced backwards away from the prop resulting in slipstream.  When the prop begins to turn on a boat that is stopped, there is a great deal of slippage, with a lot of slipstream resulting.  As the boat begins to move thru the water slipstream decreases as the prop slips less and less.  Introducing a rudder into the slipstream allows directional control.  As forward speed increases, slipstream decreases, and the current from the forward movement replaces the slipstream as the controling force.

The proper amount of throttle to get a boat moving at a speed where control is possible seems to involve more art than science.  A prop turning too fast too soon slips more than it grabs.  Too slow and the boat doesn’t want to overcome inertia and begin to move, much less obtain a speed sufficient to have control.  Knowing how much throttle is needed to overcome a boat’s inertia, and once moving, how much is required to maintain it can only be learned through practice.

Which I think is enough of the theory, now we need some practical tips.

First … slipstream exists while in reverse, however, there is no way to translate the slipstream into boat control because there is no way to introduce a rudder into the flow. Therefore, in order to control the boat while in reverse, sufficient speed is needed to promote rudder control.  Throttle control is of paramount importance while in reverse.  Too little throttle and the boat will not want to overcome its resting inertia and will be at the mercy of wind and prop walk.  Too much throttle is wasted due to the propeller slipping through the water.

Second … slipstream while in forward provides a great deal of control, reducing the amount of throttle needed to obtain rudder control.

Third (and I feel the most important of the three) … once sufficient rudder control has been achieved, you MUST reduce the throttle to a point where control is maintained.  Continued use of the throttle after that point results in excess speed, and in close quarters, loss of control!  Also, while in reverse, more throttle results in more prop walk.  Reduce the throttle and you reduce prop walk.  Shift into neutral and eliminate it alltogether.

In closing, here are a trio of cliche’s to think about:

  • “Slow is pro”
  • “Too slow don’t go”
  • “Don’t go any faster than you are willing to hit something and don’t hit anything any harder than you are willing to sign a check for”
Posted in General | 4 Comments

Tides and Currents – Where do I Find the Correct Information?

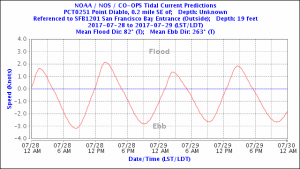
As I write this, I am preparing to instruct a July 27 Advanced Coastal Cruising class.  Part of the class preparation required of each student involves determining the best time to transit the Golden Gate the morning of July 28.  One primary factor to keep in mind is the currents.  To the casual observer, the logical time to leave the bay would be during an EBB so that you can “ride the current out.”  This is actually the worst time to go.  The EBB will meet the ocean swell and the wind, both coming in, creating some rather interesting, and sometimes dangerous, conditions the 8 miles from the bridge to the outside edge of the San Francisco Bar.  I generally time my exit for the slack before the flood in order to avoid the EBB, and have as little Flood as possible.

However, the best time to exit the Golden Gate isn’t the point of this tip, were to find information about tides and especially currents is.  I use four different sources (one book and three internet sites) to get expected tide and current data.  Knowing that, recognize that all four sources are “estimates of expected” tides and currents.  Basically, that means all four are different, with times varying by nearly 2 hours on the first slack of the day, to a 1.7 knot difference in the 0820(ish) EBB.

With that much difference, who do you trust?  Easy, whichever one you happen to have available.  The important thing is to use something.  Keep in mind, every source is an estimate.  As long as you recognize that you will be OK with whichever source you pick.  More critical than which source you use, is … are you actually remembering what you see?  Did you look at it and just jot down the slacks and the extremes because that is what you were trained to do?  Or, are you really making a mental picture of what will be happening during your sail?

As an example,  current information for each of the four sources is shown below (along with links as appropriate … bookmark them and use them.)

Currents 0.2 miles SE of Point Diablo (The Golden Gate)

2017 San Francisco Bay & Delta Tide Book
0148 S       0218 2.6 F      0512      0818 1.9 E     1130 S      1442 3.2 F      1800 S      2100 1.5 E
University of Nevada, Reno Tides and Currents
http://wolfweb.unr.edu/homepage/edc/tides/2017/sfbe_fr17.html
0001 S      0222 2.0F      0448 S      0813 3.2E      1155 S     1444 2.7F      1739S      2103 2.8E
University of South Carolina
http://tbone.biol.sc.edu/tide/tideshow.cgi?site=San+Francisco+Bay+Entrance+(Golden+Gate),+California+Current
0237 2.65 F     0543 S     0825 3.62 E     1211 S     1510 3.19 F     1824 S     2102 3.14 E
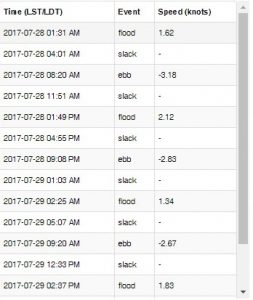
NOAA (see images below)
https://tidesandcurrents.noaa.gov/noaacurrents/Regions
0131 1.62 F     0401 S     0820 3.18 E     1151 S   1349 2.12 F     1655 S     2108 2.83 E

If I want to time my arrival at The Golden Gate for slack before flood, I should be at the bridge between 1130 and 1200.  I can expect a flood of varying intensity up to 3 knots for the next 6 or so hours.  Transiting the Golden Gate and crossing the San Francisco Bar covers approximately 8 miles.  With a speed through the water of 5.5 knots, it will take about 1:30.   However, because of the flood I can expect to add 15 to 30 minutes to my transit time.   If I arrive at the bridge at 1130, I should be through the bar by 1330 and able to make a turn south for Half Moon Bay 20 miles away.  At 5.5 knots of boat speed my arrival in Half Moon Bay should be approximately 1700.  A quick check of the NOAA tide prediction site indicates a 5+ foot high tide an hour before my arrival.  Net result, I should have plenty of daylight left and lots water under my keel when I pull into Pillar Point Harbor.

As far as my personal preferences regarding which source to use.  I ALWAYS carry a tide book in my PFD and use it if I don’t have internet access.  If I have internet access, I use the NOAA site because of the options and variety of reporting locations (of the 332 reporting locations found within California waters, there are 39 reporting locations covering every aspect of the approaches to and through The Golden Gate.)  Predictions are given in both text and line graph formats and can be downloaded in text, excel, or web formats for easy saving and/or printing.  And, it’s first person data instead of being interpreted by someone else.

In closing, find and use a tide and current reporting source that you trust.  Understand what the information means, and know what is happening at all times during any sail.  I feel so strongly about it that if you are in one of my Bareboat or Advanced Coastal classes, at some point I am going to ask what is happening with the tides and currents.  If your answer is “I wrote it down in the log book,” I will be sad.

Posted in General | 4 Comments