Ngalawa Cup: Racing on the East Coast of Africa! By Kevin Mihalik

This past summer I was approached by my friend who badly wanted to participate in the Ngalawa Cup Sailing Race in Tanzania. He needed an experienced sailor to sign up his team, and he knew that I was a Tradewinds member and a decent enough sailor. I reluctantly agreed to captain an unfamiliar engineless sailing vessel with a crew of two land lubbers in a survival sail race. It would begin in the southern Tanzanian coastal village of Kilwa and would end 10 days and over 300 nautical miles North on the upper tip of Zanzibar. Becuase I was taught to sail at Tradewinds, I had no doubt I was ready for this adventure!

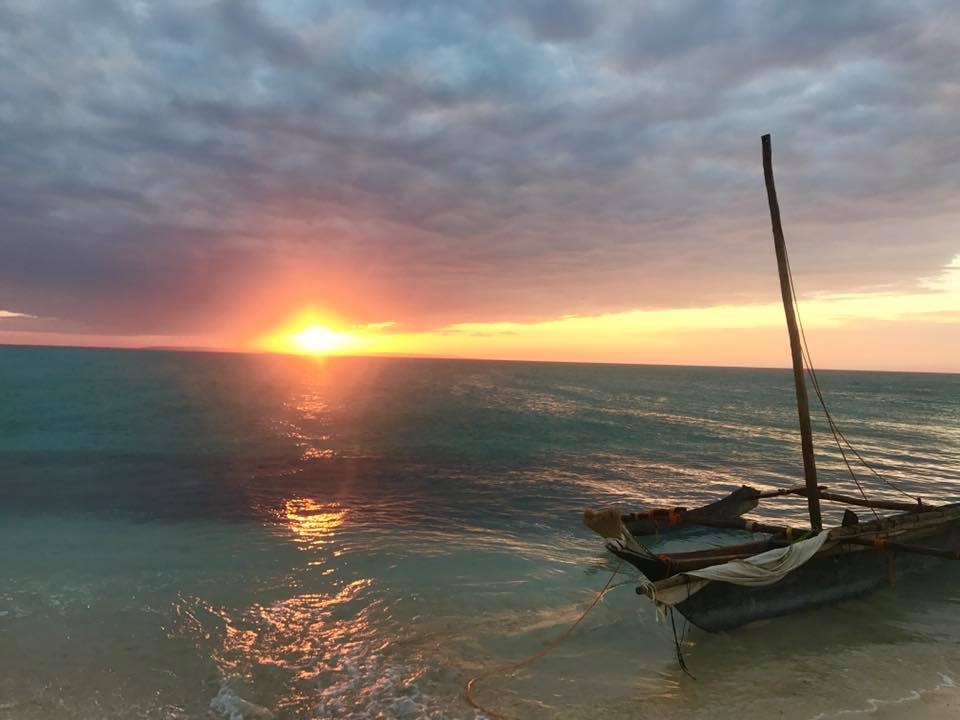
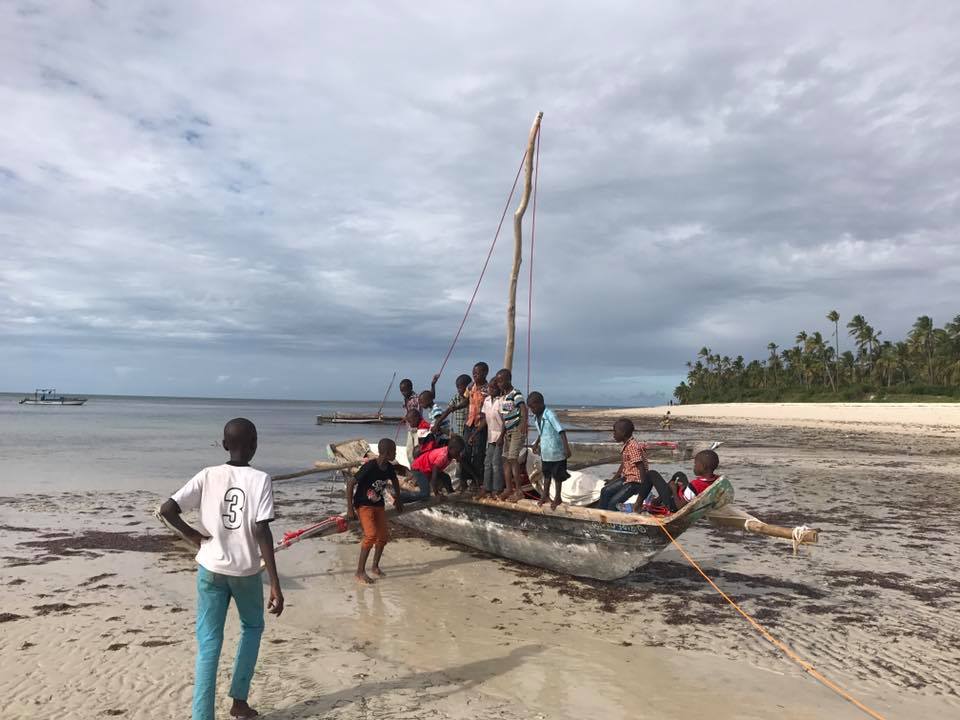
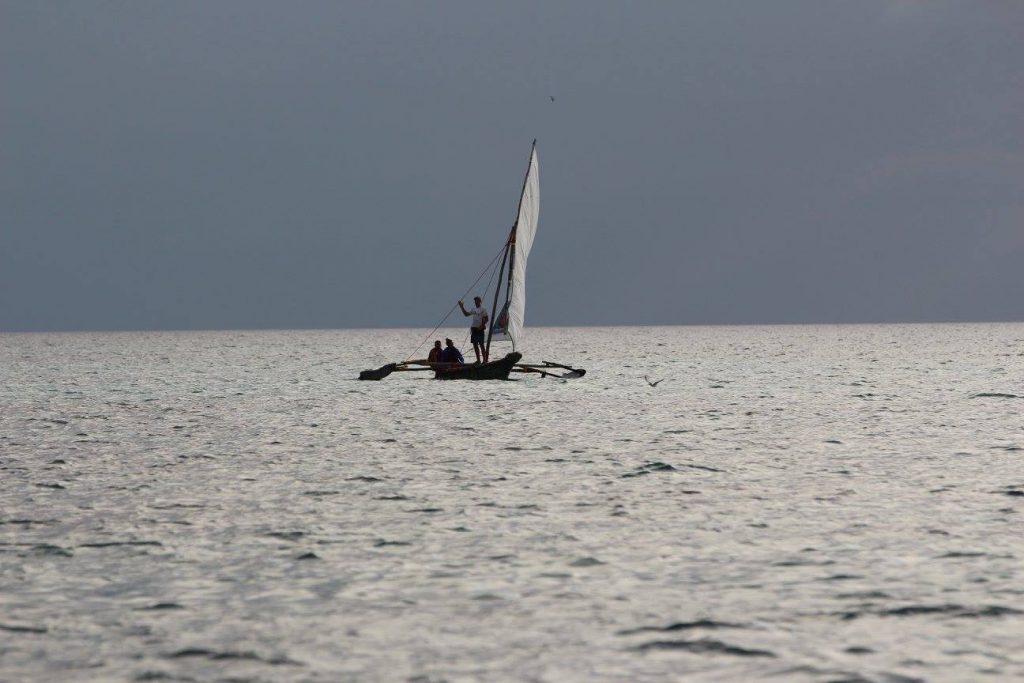
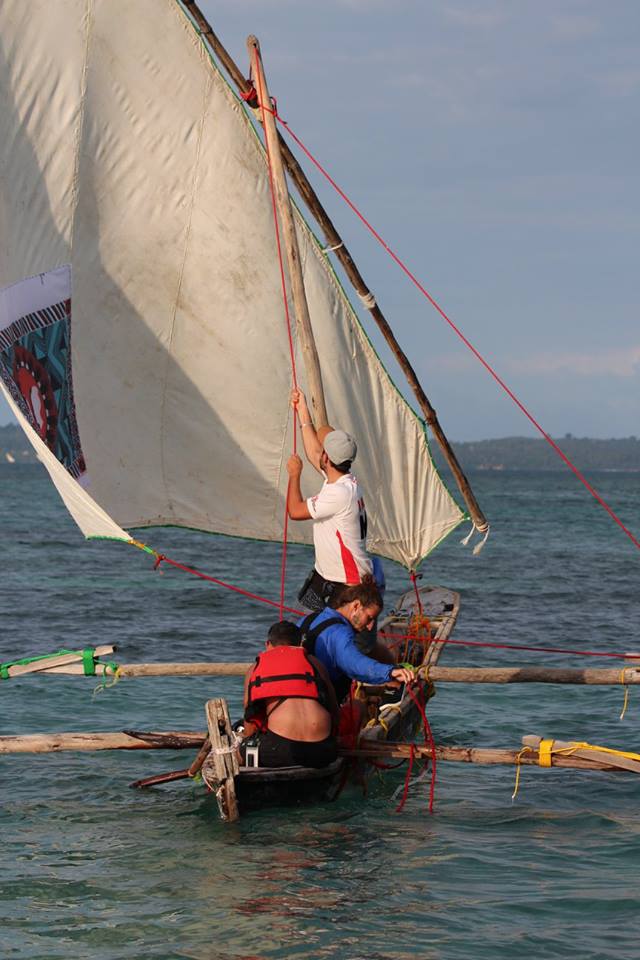
The Ngalawa: Upon arriving in southern Tanzania we were introduced to the vessels we would be bonding with over the next two weeks. The Ngalawa is an ancient African design originally used by fishermen for short trips close to the coast and not built to withstand long offshore passages. Each boat was hand made- the canoe carved out of the trunk of a mango tree. It had two large wood pontoons that were lashed to crossbeams in the boat and a thick treebranch for a mast. The yards were mostly bamboo, and our sail was nothing more than an old smelly peice of canvas with patches and tears. The hulls would leak like a spigot, so we were given a cotton cloth and wads of cow fat for plugging the leaks. It was explained to each team that these boats would most definitely break down, and we would have to either fix them ourselves or make our way to the nearest island and find a local “Fundi” (Swahili for Boat Expert) who could help with repairs.

The Course and Rules: We began each morning at 0630. Using GPS trackers we could log our start time and locations. Our GPS would ping on an hourly basis, giving our general location. Each day we sailed between 30 and 60 miles, going from one remote island to the next. We had to be on an island by sundown each day and log our landing, or else we would prompt a search and rescue by the rescue boats. The islands we stayed at each night were remote and either uninhabited or contained small tribal villages of local fishermen and their families. Some islands were required checkpoints; for other stops we were given choices for strategic value.  Each team was given inflatable pontoons and instructions on how to right a capsized vessel. Each sailor was given a GPS tracker and an LED light signal in case a MOB recovery was unsuccessful. Rescue was often hours away, so self reliance was key.

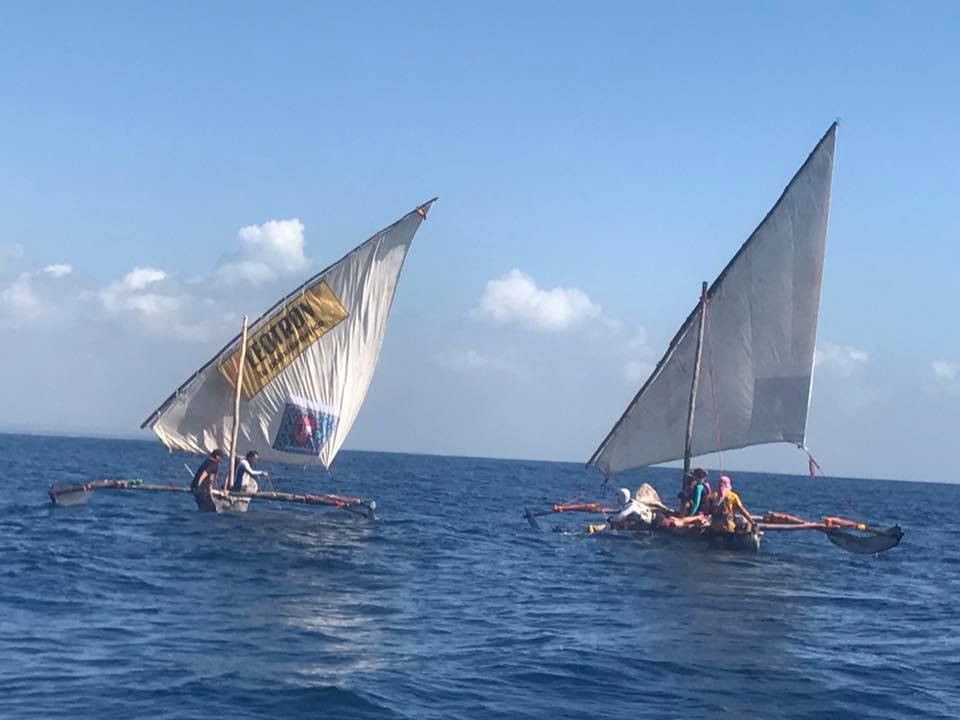
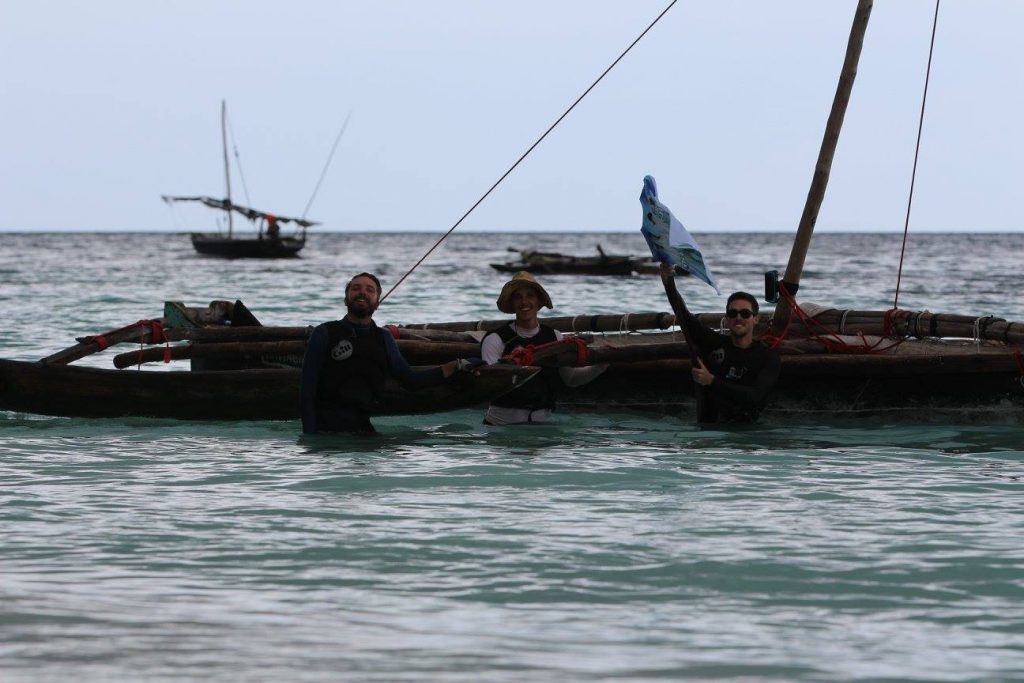
The Competition: This race is sponsored twice a year- once in late June and once in January. The teams are comprised of whoever signs up! This summer we were 1 of 6 teams: the British, the South Africans, the Australians, the French, the Spanish, and the Americans ( ‘MERICA!!!).  It was required that at least one sailor on each team have at least a little sailing experience. Due to the vagueness of this requirement, knowledge and skill levels varied WIDELY among teams. It was hard to determine who our biggest challenger would be; but on day one the British team took a strong lead within hours, so it remained throughout most the race that we were neck and neck with these cheeky sailors.

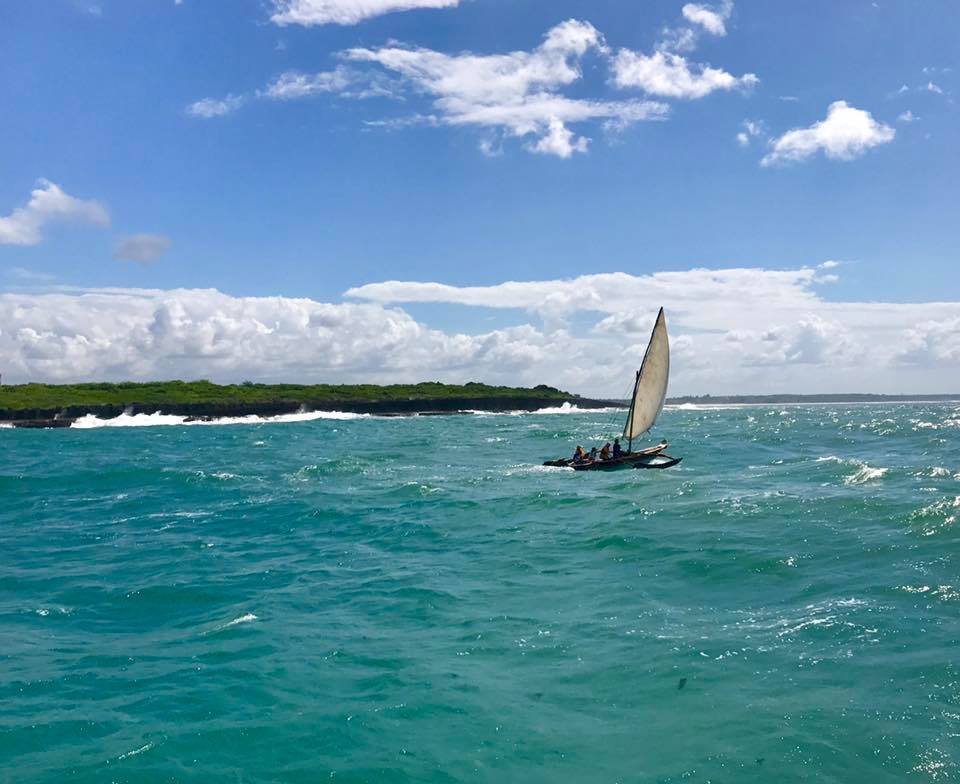
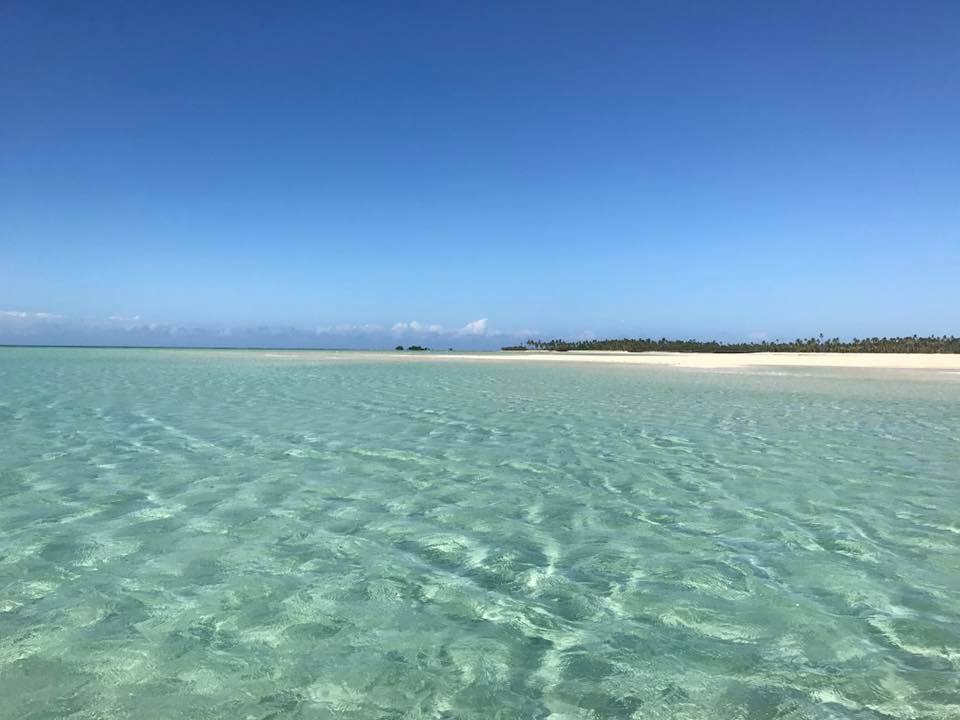
The Adventure: On day one we snapped our rudder in half and ran aground on a coral reef 3 miles off the mainland. With waves crashing down, filling our little Ngalawa, we managed to drag ourselves off the reef and use a paddle to steer our way to the next island for repairs. On day two we were hit by two squalls with gusts reaching 35+ knots. Three teams capsized this day, and one had to rescue a man over board. On day three another team’s member stepped on a stone fish, lost feeling in his leg all the way to his hip, and nearly blacked out from the pain. On day four the British team, in an effort to gain some extra time, chose to land on an island with strategic value for the race; but this island was known for having thieves, and rats the size of dogs. They didn’t sleep a wink. On day five we sailed out of the harbor of Dar Es Salaam, and while navigating the tankers and ships, we eventually found ourselves coasting through a sea of dozens of fishermen in their tiny wooden canoes. With a small battery powered speaker mounted to our mast, we blasted full volume the ‘Pirates of the Caribbean’ theme song and got the most confused looks from these local seamen. On day seven we ran out of food and had to barter with a local island’s tribal village for bananas, coconuts, fish, bread and water. On day nine we landed on the white beaches of Zanzibar’s historic Stone Town. It happened to be the last day of the Islamic holiday of Ramadan, with festivities all over the city – we ate like KINGS. On day nine we raced all day within inches of the British team trying desperately to place first! We landed on the North end of Zanzibar just minutes after the British, and we finished in second place overall. Remarkably, we sailed so well that we actually ended a day early. Over the next 36 hours, the last 4 teams made their way to the finish line, and that night was a party like no other! WE SURVIVED THE NGALAWA CUP!!!

My teammates are avid photographers and managed to bring a drone on the trip! I left mine back home – using it as a security unit (more – at www.sixtechsys.com). They compiled an amazing video so please check it out on youtube at:


For those interested in future Ngalawa Cup Races, you can find information at theadventurists.com

Posted in General | 2 Comments

Be Careful Out There

Anybody know what the two busiest boating weekends on the Bay are?

One is Opening Day on the Bay (the last weekend in April.)  The other is Fleet week, which is the first week or two of October.  This year, Fleet Week is October 7 – 14, with the main events taking place on Saturday the 12th and Sunday the 13th.  There are times during these events when it feels like you can walk across the boats occupying the waters of San Francisco Bay.

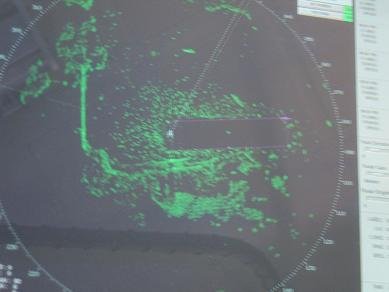
Here’s a photo of a radar screen taken during a previous Fleet Week event. It’s easy to pick out the Golden Gate Bridge, Alcatraz, and the land mass that is the San Francisco Peninsula. The black rectangle is the exclusion zone. The rest of the green dots are boats!

Fleet Week Radar Plot

Personally, I think Fleet Week is the “worst” of the two.  Not only are there a lot of boats, they are all crowded into a limited area and large areas of city front are closed, AND everyone is looking up at the air shows!  An absolute recipe for disaster.  I think my favorite example of the challenges Fleet Week can present came when the skipper of a sailboat was arguing with the Coast Guard over the VHF regarding who had the right of way … him or a container ship.  Seems this guy believes he has the right of way because he is a sailboat and the container ship is a power boat.  There was no convincing him that he was wrong.

With that in mind here is a quick review of the Rules, and the actions required by the Give-way and Stand-on Vessels.

  • Not Under Command (don’t see this one very often)
  • Restricted Ability to Maneuver (the Coast Guard may hold this type of traffic during the main events)
  • Vessel Engaged in Fishing (don’t see this on the bay very much)
  • Sailing Vessel (Port Tack gives way to Starboard Tack … If Same Tack, Windward Gives Way to Leeward)
  • Power Vessel (includes sail boats if the engine is engaged)

Rule 16 – Action by Give-way Vessel

Every vessel which is directed to keep out of the way of another vessel shall, so far as possible, take early and substantial action to keep well clear.

Rule 17– Action by Stand-on Vessel (a) (i) Where one of two vessels is to keep out of the way, the other shall keep her course and speed.

(ii) The latter vessel may however take action to avoid collision by her maneuver alone, as soon as it becomes apparent to her that the vessel required to keep out of the way is not taking appropriate action in compliance with these Rules.

(b) When, from any cause, the vessel required to keep her course and speed finds herself so close that collision cannot be avoided by the action of the give-way vessel alone, she shall take such action as will best aid to avoid collision.

(c) A power-driven vessel which takes action in a crossing situation in accordance with Rule 17(a)(ii) to avoid collision with another power-driven vessel shall, if the circumstances of the case admit, not alter course to port for a vessel on her own port side.

(d) This Rule does not relieve the give-way vessel of her obligation to keep out of the way.

Check out Rule 17, Part b … to paraphrase … if the guy that’s supposed to give way doesn’t … you must get out of his way!  It’s interesting to note the there is no “Right of Way” … there are Give Way Vessels and Stand On Vessels!

Any way it goes, if you are out there during Fleet Week you are going to have a lot of ColRegs practice … know the rules and be careful out there!

Posted in General | 1 Comment

Get off the Boat!

No, I’m not mad at you and making you get off the boat at some distant port where you must walk home. It’s me that I am talking about. It’s the skipper that must get off the boat. Never cast-off dock lines without the person responsible for the safety of the vessel and crew getting off the boat and taking a walk around the vessel while making a final check of SAFETOGO and COOL items. Especially, the Onboard rigging, Coolant, and Overboard Lines portions of the checkout process.

For a refresher of SAFETOGO:

  • Safety Equipment
  • Atmospheric Conditions
  • Floorboards
  • Engine
  • Tides and Currents
  • Onboard Rigging
  • “Gas” or Diesel
  • Steering

And Cool:

  • Coolant
  • Oil
  • Overboard Lines

Before starting the saltwater motor from What is 180, all items of SAFETOGO and COOL must be checked off. Unfortunately, too often that’s the end of the safety check process. It shouldn’t be!

Immediately after starting the motor, go back and do a more complete check of the onboard rigging, coolant, and overboard line situation. The best way to do that is to get off the boat and do a walk around.

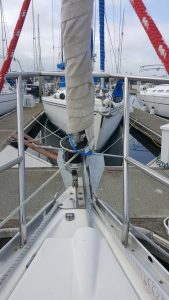
Start wherever the exhaust from the motor exits the boat. Then, make as complete a circle around the boat as the docks allow, checking every aspect of the boat from stern to stem, and from waterline to the top of the mast. Follow an organized process … better yet … develop a checklist for yourself to follow.

For example:

  • Exhaust – is there sufficient coolant exiting the exhaust to indicate proper cooling of the motor is taking place?
  • Transom – is/are there signs of damage? Backstay properly attached?
  • Stern Pulpit – Damaged? Sturdy? “Legs” properly fastened? Lifelines properly attached?
  • Backstay – Move your eyes the entire length of the backstay, pausing regularly for a few seconds to let your brain catch up and interpret what your eyes a seeing. Yes, there is a difference between looking and seeing. It’s your brain.
  • Mast head backstay connection – use binoculars if it helps.
  • Mast head instruments – in place and working properly? You might even have someone check the electronic readouts on any mast head instruments to make sure they are working.

So far, you have not even moved from the original starting point. Now, start moving slowly forward, checking things as you go.

  • Hull?
  • Toe rail?
  • Stanchions?
  • Lifelines?
  • Are there any lines in the water?

When you get to the shrouds:

  • Chain plates?
  • Turnbuckles?
  • Wire?
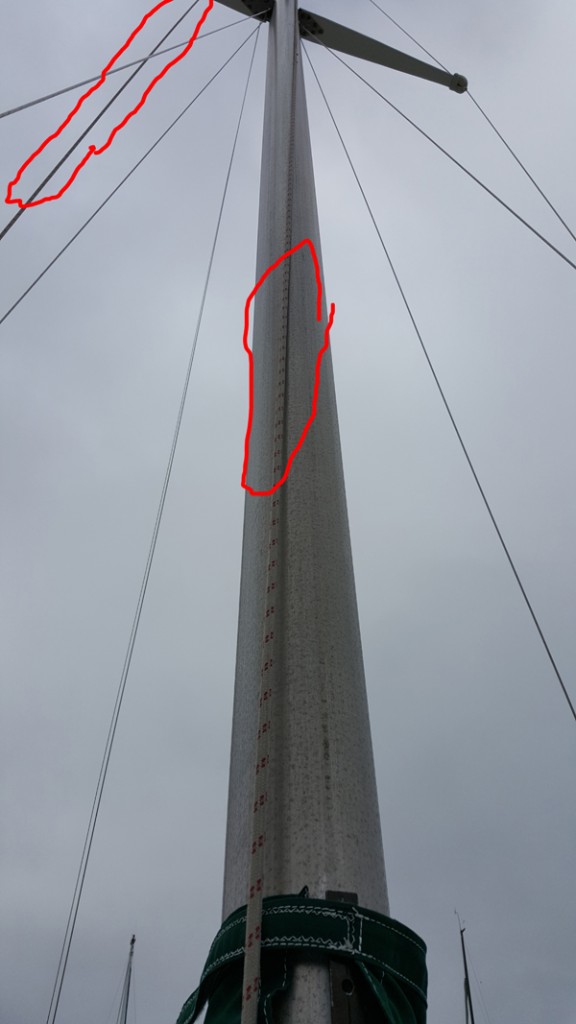
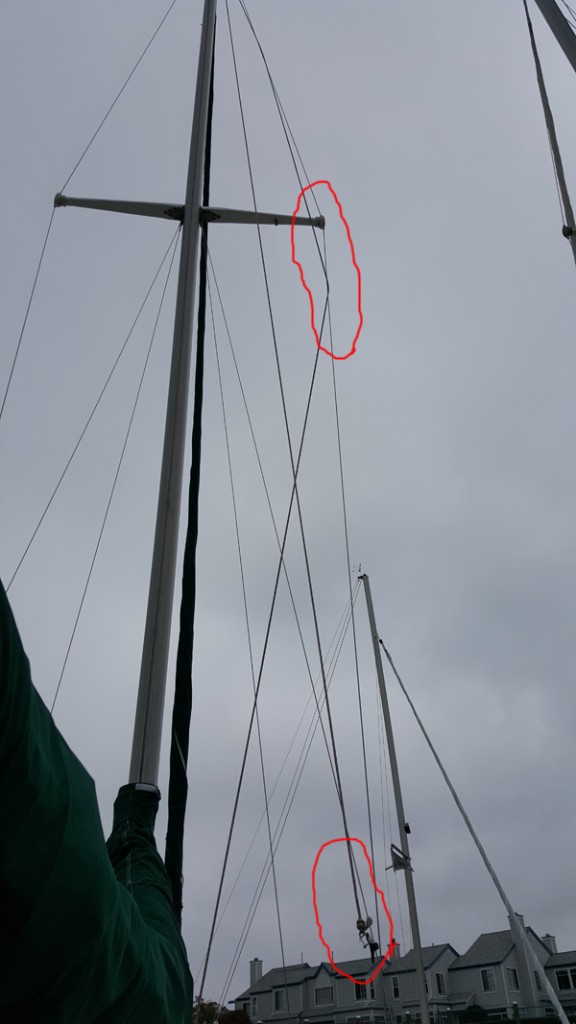
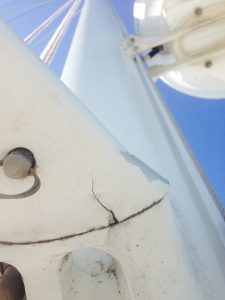
  • Spreaders – (this one check should be slow and complete) Proper horizontal angles? The same on both sides? Shrouds over the tips? Properly attached to the mast? Visible cracks? Anything that just “doesn’t look right”?
  • Below spreader attachments?
  • Mast head attachments?

Continue forward looking at the hull, toe rail, stanchions, and lifelines, and lines in the water:

  • Bow pulpit?
  • Bow roller?
  • Anchor?

At the forestay:

  • Deck attachment?
  • Furling drum?
  • Jib tack – is it properly attached and positioned in relation to the furling system?
  • Jib sheets – properly attached to the clew with two wraps around the furled sail? Properly routed along the deck, through fairleads, and back to the jib sheet winches?
  • Jib halyard properly tensioned (DO NOT change the jib tension … if a problem is noticed, notify the office and we will correct it).

Start moving aft repeating the process on the other side (in reverse).  When you arrive back at the transom:

  • Topping lift – in place? Damaged? Functioning properly?
  • Visually check the main halyard – Properly attached to the head of the sail? Properly routed to the top of the mast? Wrapped around or through anything (topping lift, lazy jacks)

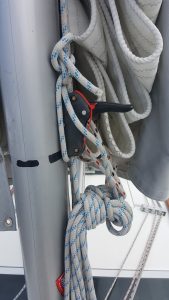
By now, your eyes should have traveled to the top of the mast at least twice.  Each time, follow the mast back down and check everything (e.g. are all clutches on the mast closed).

At some point during the walk around, you will pass the shore power connection. Is it disconnected and secured on the dock (or, removed from the dock and stowed aboard if you are going to dock overnight somewhere with shore power)?

How about dock lines. As you move around the vessel, check what lines are in place, and which might be safely removed as you go. For example, can the springs be removed and placed safely on the dock? I personally make sure any line long enough, and positioned in a place that it can reach the propeller, has been removed and placed securely on the dock. I do not want it to fall in the water while casting off.

In closing, as a captain, it is critical that before casting off lines and departing, you personally have done everything in your power to verify the safety of your vessel! The lives of yourself and your crew may depend on it.

Posted in General | 1 Comment

Just Bail Out Dude

I relearned a valuable lesson the other day.  I really hadn’t forgotten it, I just chose to not apply it.  The lesson?  If it isn’t happening the way it is supposed to, just bail out and start over again.  Don’t try to save it.

So, it’s confession time.  A couple weeks ago, in my own boat, I had just left the pump out station, and was backing down the fairway to back into my slip.  Something I regularly do.  For some reason, the boat wanted to drift to one side of the fairway.  The weird thing, it was the windward side that I kept drifting towards and away from prop walk.  It made no sense.  The smart thing to do would be to just start over, but I kept telling myself I could fix it … right up to the point my lifesling box touched the stern of another boat.  Fortuntely I was moving very slow and it was plastic on my boat against stainless on the other boat so there was no damage to anything but my ego.  The one thing I did right was to keep my bow pointed away from trouble, so I was able to get away with no further incident.

After getting the boat in her slip, I thought about what had happened.  It was one of the largest tidal swings of the year.  Large enough that there was noticeable current in a marina that current isn’t a problem.  I was moving with the current and didn’t even realize it.  Had I bailed out, I probably would have figured out what was happening and made adjustments accordingly.  But, I didn’t.  Lesson learned.

Don’t worry, I didn’t just walk away.  I went over and talked to the other boat owner.  He was on board and hadn’t even realized he had been “hit”.  To be safe, we checked his boat out together and verified no damage (except, as I said, to my ego, but that’s OK, the next day I had to single handed sail a boat with a dead motor back to the dock, and nailed it.  Ego fixed … but that’s another skippers tip.)

Posted in General | 4 Comments

Slipstream

A better title for this Skippers Tip might be Slipstream, Prop Walk, and Rudder Control, however that seemed a bit long and tedious, so lets just call it Slipstream.

According to Merriam-Webster, slipstream is defined as “a stream of fluid (as air or water) driven aft by a propeller.”  We often times use the term “prop wash” to describe the phenomenon , however, slipstream is the more correct term.  Slipstream is easy to see.  Simply shift the transmission into forward, and watch the water behind the boat.  The current travelling backward from the boat is slipstream, and is one of the most valuable forces at your disposal while motoring.  Control of a sailboat is obtained by either getting current flowing across the rudder due to movement thru the water, or by slipstream created by the propeller forcing a stream of water aft over the rudder.

To understand slipstream, lets start with a very basic discussion of the propeller.  A propeller is generally defined by four criteria; number and shape of the blades, diameter of the circle the propeller turns within, pitch, and direction of rotation. A notation stamped into the propeller such as 12 X 10 RH indicates a clockwise (or right hand) turning, 12 inch diameter prop with a 10 inch pitch.  Basically, a propeller is a screw (which is actually another name for the propeller).  Pitch is an indication of how far the prop would move forward if there was no slipping thru the water.  In this case, 10 inches of forward movement for each revolution of the prop.  Unfortunately, water is soft and slippery, so as the prop turns it does not make it 10 inches and any excess water it grabs is forced backwards away from the prop resulting in slipstream.  When the prop begins to turn on a boat that is stopped, there is a great deal of slippage, with a lot of slipstream resulting.  As the boat begins to move thru the water slipstream decreases as the prop slips less and less.  Introducing a rudder into the slipstream allows directional control.  As forward speed increases, slipstream decreases, and the current from the forward movement replaces the slipstream as the controling force.

The proper amount of throttle to get a boat moving at a speed where control is possible seems to involve more art than science.  A prop turning too fast too soon slips more than it grabs.  Too slow and the boat doesn’t want to overcome inertia and begin to move, much less obtain a speed sufficient to have control.  Knowing how much throttle is needed to overcome a boat’s inertia, and once moving, how much is required to maintain it can only be learned through practice.

Which I think is enough of the theory, now we need some practical tips.

First … slipstream exists while in reverse, however, there is no way to translate the slipstream into boat control because there is no way to introduce a rudder into the flow. Therefore, in order to control the boat while in reverse, sufficient speed is needed to promote rudder control.  Throttle control is of paramount importance while in reverse.  Too little throttle and the boat will not want to overcome its resting inertia and will be at the mercy of wind and prop walk.  Too much throttle is wasted due to the propeller slipping through the water.

Second … slipstream while in forward provides a great deal of control, reducing the amount of throttle needed to obtain rudder control.

Third (and I feel the most important of the three) … once sufficient rudder control has been achieved, you MUST reduce the throttle to a point where control is maintained.  Continued use of the throttle after that point results in excess speed, and in close quarters, loss of control!  Also, while in reverse, more throttle results in more prop walk.  Reduce the throttle and you reduce prop walk.  Shift into neutral and eliminate it alltogether.

In closing, here are a trio of cliche’s to think about:

  • “Slow is pro”
  • “Too slow don’t go”
  • “Don’t go any faster than you are willing to hit something and don’t hit anything any harder than you are willing to sign a check for”
Posted in General | 4 Comments

Tides and Currents – Where do I Find the Correct Information?

As I write this, I am preparing to instruct a July 27 Advanced Coastal Cruising class.  Part of the class preparation required of each student involves determining the best time to transit the Golden Gate the morning of July 28.  One primary factor to keep in mind is the currents.  To the casual observer, the logical time to leave the bay would be during an EBB so that you can “ride the current out.”  This is actually the worst time to go.  The EBB will meet the ocean swell and the wind, both coming in, creating some rather interesting, and sometimes dangerous, conditions the 8 miles from the bridge to the outside edge of the San Francisco Bar.  I generally time my exit for the slack before the flood in order to avoid the EBB, and have as little Flood as possible.

However, the best time to exit the Golden Gate isn’t the point of this tip, were to find information about tides and especially currents is.  I use four different sources (one book and three internet sites) to get expected tide and current data.  Knowing that, recognize that all four sources are “estimates of expected” tides and currents.  Basically, that means all four are different, with times varying by nearly 2 hours on the first slack of the day, to a 1.7 knot difference in the 0820(ish) EBB.

With that much difference, who do you trust?  Easy, whichever one you happen to have available.  The important thing is to use something.  Keep in mind, every source is an estimate.  As long as you recognize that you will be OK with whichever source you pick.  More critical than which source you use, is … are you actually remembering what you see?  Did you look at it and just jot down the slacks and the extremes because that is what you were trained to do?  Or, are you really making a mental picture of what will be happening during your sail?

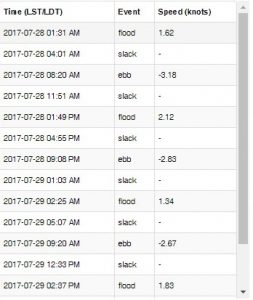
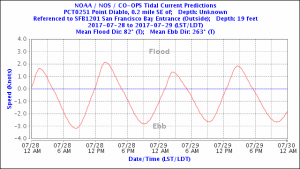
As an example,  current information for each of the four sources is shown below (along with links as appropriate … bookmark them and use them.)

Currents 0.2 miles SE of Point Diablo (The Golden Gate)

2017 San Francisco Bay & Delta Tide Book
0148 S       0218 2.6 F      0512      0818 1.9 E     1130 S      1442 3.2 F      1800 S      2100 1.5 E
University of Nevada, Reno Tides and Currents
http://wolfweb.unr.edu/homepage/edc/tides/2017/sfbe_fr17.html
0001 S      0222 2.0F      0448 S      0813 3.2E      1155 S     1444 2.7F      1739S      2103 2.8E
University of South Carolina
http://tbone.biol.sc.edu/tide/tideshow.cgi?site=San+Francisco+Bay+Entrance+(Golden+Gate),+California+Current
0237 2.65 F     0543 S     0825 3.62 E     1211 S     1510 3.19 F     1824 S     2102 3.14 E
NOAA (see images below)
https://tidesandcurrents.noaa.gov/noaacurrents/Regions
0131 1.62 F     0401 S     0820 3.18 E     1151 S   1349 2.12 F     1655 S     2108 2.83 E

If I want to time my arrival at The Golden Gate for slack before flood, I should be at the bridge between 1130 and 1200.  I can expect a flood of varying intensity up to 3 knots for the next 6 or so hours.  Transiting the Golden Gate and crossing the San Francisco Bar covers approximately 8 miles.  With a speed through the water of 5.5 knots, it will take about 1:30.   However, because of the flood I can expect to add 15 to 30 minutes to my transit time.   If I arrive at the bridge at 1130, I should be through the bar by 1330 and able to make a turn south for Half Moon Bay 20 miles away.  At 5.5 knots of boat speed my arrival in Half Moon Bay should be approximately 1700.  A quick check of the NOAA tide prediction site indicates a 5+ foot high tide an hour before my arrival.  Net result, I should have plenty of daylight left and lots water under my keel when I pull into Pillar Point Harbor.

As far as my personal preferences regarding which source to use.  I ALWAYS carry a tide book in my PFD and use it if I don’t have internet access.  If I have internet access, I use the NOAA site because of the options and variety of reporting locations (of the 332 reporting locations found within California waters, there are 39 reporting locations covering every aspect of the approaches to and through The Golden Gate.)  Predictions are given in both text and line graph formats and can be downloaded in text, excel, or web formats for easy saving and/or printing.  And, it’s first person data instead of being interpreted by someone else.

In closing, find and use a tide and current reporting source that you trust.  Understand what the information means, and know what is happening at all times during any sail.  I feel so strongly about it that if you are in one of my Bareboat or Advanced Coastal classes, at some point I am going to ask what is happening with the tides and currents.  If your answer is “I wrote it down in the log book,” I will be sad.

Posted in General | 4 Comments

Sailing under Jib Alone

Here’s the short answer, unless you are on your own boat, understand and are willing to take the risk, don’t do it.  If you are interested in why, read on.

When sailing on any point of sail from a close haul to a broad reach, a jib is not nearly as effective as the main.  A large part of the reason why boils down to something called the Center of Effort (COE) vs. the Center of Lateral Resistance (CLR).  Without getting too technical, COE is the specific point in the sail plan where the force of the wind trying to move the boat forward is focused.  Each sail has it’s own COE, located more or less at the geometric center of the sail.  The boat as a whole has a COE located between the COE of the jib and the COE of the main.  There are a number of factors that can influence and move the COE forward and aft.  Factors that are expanded upon in the Advanced Coastal Cruising class, so I won’t go into them here.  For now, as I indicated, a simplified version says the overall COE should be located somewhere between the jib COE and the main COE.

CLR on the other hand is below the waterline.  It is the point where the boat is perfectly balanced fore and aft.  Push on that point, and the boat will move directly away.  Push forward of the CLR and the bow moves more than the stern.  Push aft of the CLR and the stern moves away.

The net result is that while sailing, the COE should be above and slightly aft of the CLR.  Doing so results in a slight amount of weather helm (the tendency of the boat to want to turn towards the wind).  If you remove the main from the equation the weather helm goes away and is replaced by lee helm because the COE is now forward of the CLR  There are several down sides to lee helm.  First, you loose the feedback at the helm that weather helm gives you.  Second, it is very difficult to head up with lee helm, and even more difficult to tack.  Typically, the boat will stall half way through the tack, ending up in irons.  Finally, an untended rudder on a boat with weather helm will turn into the wind and stop.  With lee helm, the boat turns away from the wind and continues to run until something (like a lee shore) brings it to a stop.  Yeah, I know, how many sailors are going to walk away from the helm and let that happen.  You may not have a choice.  Maybe you just fell overboard, or even more likely, the steering breaks, and you no longer have control of the rudder.  It happens, far too often for me to want to take a chance.

That brings us to the one situation where sailing under jib MAY be OK, sailing downwind in a mild to moderate wind.  However, there are a number of caveats.  First, make sure you have a backstay!  Several years ago, three boats in the Caribbean experienced rig failures, on the same day.  The problem, no backstay to absorb the forces placed on the mast.  The wind was above “moderate” resulting in the masts falling forward.  In this case, all three boats were Hunter’s, however, any boat with no backstay is subject to the same problem.  Also, if the forestay is fractional (does not go all the way to the top of the mast) then the forestay and backstay don’t match up.  The forestay attaches a number of feet lower, placing uneven pressure on the mast.  When the main is up, the leach of the main helps ease that pressure.

Basically, we have now eliminated nearly all situations.  To recap:

  • Don’t sail under jib alone close hauled, close reaching, or beam reaching.
  • Probably not even a good idea to sail under jib alone on a broad reach.
  • Don’t do it on a boat with no backstay
  • Fractional rigs can be a problem.
  • A jib alone in anything more than about 15 knots is asking for trouble, for example, furling it will be a challenge, the mast can “pump”, and your bow is going to tend to be forced down (not a good idea when surfing down a wave face.)
  • And, finally, think about what happens if you loose steering control.  With a main, you can bring the boat into the wind and stop while you deploy an anchor.  With a main and jib, you can actually steer the boat by either trimming the main and easing the jib (to head up) or trimming the jib and easing the main (to bear away).

All in all, sailing under jib alone is not a good idea.  If you are sailing your own boat, and you understand the risks (all those items listed above), then go for it, it’s your boat.  If it’s not your boat (aka a Tradewinds Charter) there are too many things that can go wrong, all of which may result in painful injuries to you, your crew, or your pocket book.

Posted in General | 9 Comments

Why Knot?

I have been accused of being the resident Tradewinds knot geek, and sadly, I think it’s probably true, however, that doesn’t lessen the importance of being able to tie certain knots.  As a sailor, being able to tie certain knots is critical, possibly even life saving.

Here’s a little basic terminology for you.  Knots fall into three general categories.

  1. Hitches are knots that attach a line to something else.  For example, a cleat hitch attaches a line to a cleat.
  2. Bends attach lines to other lines.  A great example is a sheet bend that joins two lines end to end.
  3. Knots (I know, this is a little weird … one of the categories of knots is knots).  Knots are pretty much anything else, typically loops, binding knots, and knobs, the most common example being a reef knot, which joins the two ends of the same line together to “bind” something (like the sail to the boom) in place.

So, what knots do you really need to know as a sailor?   This is just one sailor talking, however, here is my opinion, listed pretty much in the order of the frequency I use them.  There are six knots that are “must knows” and a couple of other nice to knows.

  1. Cleat Hitch.  It’s a rare sail that I don’t tie at least one cleat hitch.  Even at Tradewinds docks where we leave dock lines at the dock for most of the boats, I find myself using cleat hitches.  I use them at other docks, at the pump out station, and on the boat to secure spring lines during docking.
  2. Figure Eight Knot.  This is one of those “knobs” I mentioned earlier.  It puts a knob in the end of the line to act as a stopper.  I’m always amazed when I get on a boat how many of the sheets and lines that need a stopper don’t have them.
  3. Bowline.  Another knot, this in the form of a temporary loop.  Practice this one a lot, because you should be able to tie it in the dark, using only one hand, while hanging upside down in a locker.  You should be able to tie small loops and loops that are 10 feet in diameter (There is an easy trick to it.  If you  are in the office and want to know how, just ask me).
  4. Round Turn with Two Half Hitches.  The two half hitches are the actual knot.  The round turn part just means you wrap the line around whatever you are attaching it to one and a half times.  This knot is invaluable for attaching fenders and hanging coils of line.
  5. Sheet Bend.  It doesn’t happen often, but there are times when you need to join two lines together.  This is the best knot to use.  You can also use the same knot to join the bitter end of a line to a loop in the end of another line.  In this case it’s called a becket bend, however, it’s the same knot.
  6. Rolling Hitch.  I love this one.  Don’t need it often, but when you do it might save some money.  Use it to attach the end of a line to the middle of another line and grab hold so you can pull.  The first time I used it, the boat’s skipper was opening a knife to cut a jib sheet that was “hopelessly” overwrapped on a winch.  The rolling hitch allowed me to get enough slack to undo the overwrap.  At more than a dollar a foot for line, cutting a jib sheet can get expensive.  I also works great for attaching a snubber to an anchor rode.

That’s it for my “must know” knots.  Some “nice to know’s” are the clove hitch, the truckers hitch, and the heaving knot.  And then there are the “cool to know” knots like the Running Turks Head, Monkey Fist, Solomon’s Bar and Constrictor Knot.

If you are interested in learning, re-learning, or practicing any of these knots, stop by.


Posted in General | 2 Comments

Docking on the Windward Side!

I made it clear last time that I usually prefer the leeward side, but there are good reasons to use the windward side as well, now that we were able to to get one of the aluminum docks in buffalo ny designs we don’t really see a difference. I’ll use the example of our pump-out station here at D-dock again because it is familiar to our members.

Reasons to use the windward side:

  1. The leeward side is full or for some reason your only choice is windward.
  2. All of the necessary line handling (arrival and departure) can be done from the cockpit with no one forward!
  3. It’s a great time to practice your boat-backing skills!

Just like last time, line handling will be accomplished from the boat, prop walk is to port, and wind is from the South.

I’m going to start with what NOT to do:

NO U-Turns! This is a very bad idea. I see people get away with it, but I’ve also been around when it did not go well and it looks very bad! With the wind blowing on your bow, if you can’t complete the turn, you end up pinned in the corner. It’s very hard to complete the maneuver because when you use reverse, prop-walk turns you the opposite direction you want to go. You’ll also tend to land bow-first, with the wind blowing your bow into the dock, so even if you make it around, your stern is out away from the dock and has to be pulled in manually – after you get someone on the dock from farther forward. Very sloppy!

You certainly could just go in forward and then back out when you leave, but again prop-walk is pulling your stern into the dock when you leave, so you’ll need to use a bow-spring to get that stern waaaay out before you back away. This is do-able, and I’ll try to address that next time. For now, I’m going to focus on my favorite approach to the windward side – backing in! I think it’s worth stating here for the record: sailors who are comfortable backing almost never end up paying insurance deductibles! Most of the incidents around the docks occur when people try too many fancy maneuvers to turn a boat around when they could easily back out of trouble if they were comfortable in reverse. I’ll try to remember to publish a blog article with some practice routines for getting comfortable going backwards another time.

So you’ve decided to back in, and of course, look good doing it! Here’s how it’s accomplished:

  1. Prep the crew and lines: Your crew should already be trained to toss a line over a cleat. Put fenders on the starboard side and prepare a starboard side stern line with crew ready to use it. This is nice because the crew is in the cockpit, near you, and communication is easy.
  2. Look good transitioning to reverse: We’ve all seen people stop a boat and start to back up, only to find the boat spinning when factors like prop-walk and wind start to take over as speed is low during the transition. This should be done just like during our anchoring drills. Find a spot away from the docks with some extra space, put the wind 5ish degrees off the starboard bow, and balance wind and prop-walk by throttling up and down in reverse to make the boat stop in a straight line and back up in the same straight line until you are going fast enough to have steerage-way in reverse. (This may be another blog entry, but everyone should know this technique from BCC class!)
  3. Back into position: Back the boat, looking where you are going, not where you’ve been. Bring it to a position where your stern cleat is parallel to the cleat on the dock you want to secure it to. Stop the boat about 1-2 feet from the dock. The most important things here are being close to the dock (if you are too far away, your bow will blow in and push your stern out) and to come to a complete stop (the boat is going to blow into the dock either way, you want it stopped so that when it makes contact, there is no forward or reverse motion rubbing the side of the boat on the dock).
  4. Toss the line and settle: Now toss the line over the cleat, pull out all of the slack, and let the boat settle against the dock. Pulling on the line should pivot the bow away from the dock so that your stern stays in close. Once again, the cleat is red and the line is green in the diagram. The wind will hold the bow in place. This is another common mistake I see often – whether coming in forward or backward, there is crew scrambling to get a bow line attached – for some reason, people seem to think that is the most important line. On the windward side, the wind will keep your bow pinned, only a stern line is necessary. Be very careful that you are aware of the wind direction or of changing factors. If the wind should shift to the West and get on the opposite side of your bow, it will blow it out away from the dock quickly. It’s usually not a problem here, but it does shift that way occasionally.
  5. Now that we are safely settled on the dock, toss a bow line and spring-lines as needed, depending on how long you plan to stay to do your business at this dock.

“OK, Matt – now I’m pinned on the windward side – you warned me about this last week! How do I get out of here?!” Good question! This is the next cool part:

Center your rudder. Remove all lines except that same stern line. Make sure there is a fender right at the stern. Put the boat in reverse and see how far the bow swings out away from the dock. Depending on the strength of the wind, you may need to use more throttle (make sure that crew holding the line has a wrap around the cleat and their hands are clear!). The bow will move away from the dock and when you feel like the angle is safe enough, you can throttle down, transition to forward, and slip the line off the cleat. This will need to be done quickly before the bow starts to blow back to the dock, but after a little practice you will find that it doesn’t feel rushed. If things don’t go right (line gets stuck on the cleat or anything feels unsafe), just throttle down, go back to neutral, and let the boat settle back against the dock. It’s important to keep the rudder centered while you drive away. The tendency is to turn away from the dock, but this will drive your stern INTO the dock, so resist the temptation!

Now go practice until you look good doing it!

Posted in General | 3 Comments

Docking on the leeward side!

But it’s so much easier to use the windward side! You just stop the boat and it bumps the dock and you are there! Why would you choose the leeward side? Here are a couple of reasons:

  1. It’s the only spot available or only option for whatever reason.
  2. The pump-out hose will only reach if you are on the leeward side.
  3. You like to plan ahead for your exit! If it’s really windy, it can be tough to escape from the windward side without damage or incident!

OK, so you’ve decided the leeward side is for you – now what’s the best way to accomplish it? As you know, at Tradewinds, we teach almost all of our docking techniques so that they can be accomplished from the boat (no one stepping or jumping to the dock from the boat) and by two people – almost always with just one dock line to secure the boat. We’ve seen a few variations on the following procedure lately that made us nervous, so I’m going to put it in steps, with diagrams, and explain our favorite way to perform each step and tell you why it’s our favorite!

Assumptions: Port prop walk, wind from the South

  1. Prep: Put out fenders on the starboard side. Prepare crew with a dock line, tie a bowline on one end and secure it to your starboard mid-ship cleat. Crew should be sitting or standing safely at the mid-ship cleat with the line outside of the lifelines and ready to toss over a cleat. Line-tossing techniques are a subject for another day, but hopefully you’ve trained your crew in how to perform this!
  2. The Approach: Approach the dock in forward at about a 30ish degree angle. Choose a cleat that will be near the stern of your boat once you are docked and aim directly for it. The cleat we’ve chosen is in red on this diagram.
  3. The Turn & Stop: Approaching our chosen cleat, you’ll want to turn to port and use reverse to stop the boat. Here is where the 30ish degree angle is important. The momentum gained from turning to parallel the dock will combat prop-walk and you’ll be able to stop the boat without the stern pulling away from the dock. you should stop with your mid-ship cleat (and crew) parallel to the cleat and about 5 feet from the dock. In high winds the stop needs to be brief so that you don’t begin to blow away from the dock before moving on to the next step. The 5 foot gap is important because it becomes very hard to catch a cleat when it is under the curve of the boat. You don’t want to be right against the dock to do this right (and make it look good!).
  4. The Line Toss: Your crew should toss the line over the cleat, take all of the slack out of it, and put a wrap back around the cleat on the boat with the bitter end. VERY IMPORTANT: The boat should be at a complete stop, and you should not move on to the next step until all of the slack is out and there is a wrap on the cleat! If the boat is not stopped, you’ll be using your crew to stop the boat – this is bad – you want to use the motor to stop the boat. Aside from potentially damaging your crew, you’ll end up with a very bad looking maneuver because when the line gets taut, the bow will swing toward the dock. (Line-tossing tip: I like to make small coils with the extra line, split them in half, and hold half of the coils in each hand. Hold the bitter end with your pinkie finger. Toss the two coils wide on either side of the cleat and well past it. When they land on the dock, you can pull the bitter end and the line has no place to go but around the cleat.) Here you are, stopped parallel to the dock with the line (green) taut and secured.
  5. The Super-Cool-Looking-Parallel-Pin-the-Boat-Against-the-Dock: This is the best part! This has to be done fairly quickly (remember, the wind is trying to push us away from the dock now that we are stopped). It is critical to do these things in the proper order. Turn the rudder all the way to port (away from the dock). Put the boat in forward gear. No extra throttle should be required, but you can add a little if it’s necessary due to very high winds. Two major important things happen here: One – being in forward gear is going to want to swing the boat in an arc and drive the bow into the dock (you can test this, gently, by following all of the steps, but keeping the rudder centered). Two – the prop-wash, water hitting the rudder (brown) and being deflected to the port side of the boat, is going to push the stern toward the dock. The result? Glorious, awesome-looking docking skills. The boat will stay parallel to the dock and move forward until it is pinned:
  6. The Tidy-Up: Now that you are pinned against the dock, do not take the boat out of gear! Leave it just as it is and it will stay pinned to the dock. Some small helm adjustments may be necessary to keep it parallel (wind will try to blow the bow away from the dock). While it is pinned here, you can easily toss bow and stern lines over the cleats. Once you are secure, you can take the boat out of gear and shut down the engine.

Practice this a few times in varying conditions and you’ll look like a real pro before long! Another beautiful thing about the position you are now in is the departure. Start the engine, put the boat back in forward gear, and remove the bow and stern lines. Tell your crew to be ready to cast off. Center the rudder, put the boat in reverse, and give the order to cast off the mid-ship line. Use enough throttle to make the prop-walk at the stern balance the wind at the bow until you gain steerage way. You should be able to back away in a straight line an are in no danger of rubbing the dock, since you are downwind of it!

Have fun, and look good doing it!

Posted in General | 3 Comments